Using The Projections Workspace
Using the Projections Workspace in Filey, you can map out your clients’ financial projections and have the scenario rendered back into the SOA.
Step 1: Open The Projection Workspace

From the Projections card in the Finley SOA Workspace, click on ‘Open Projections’
Step 2: Open The Projection Workspace
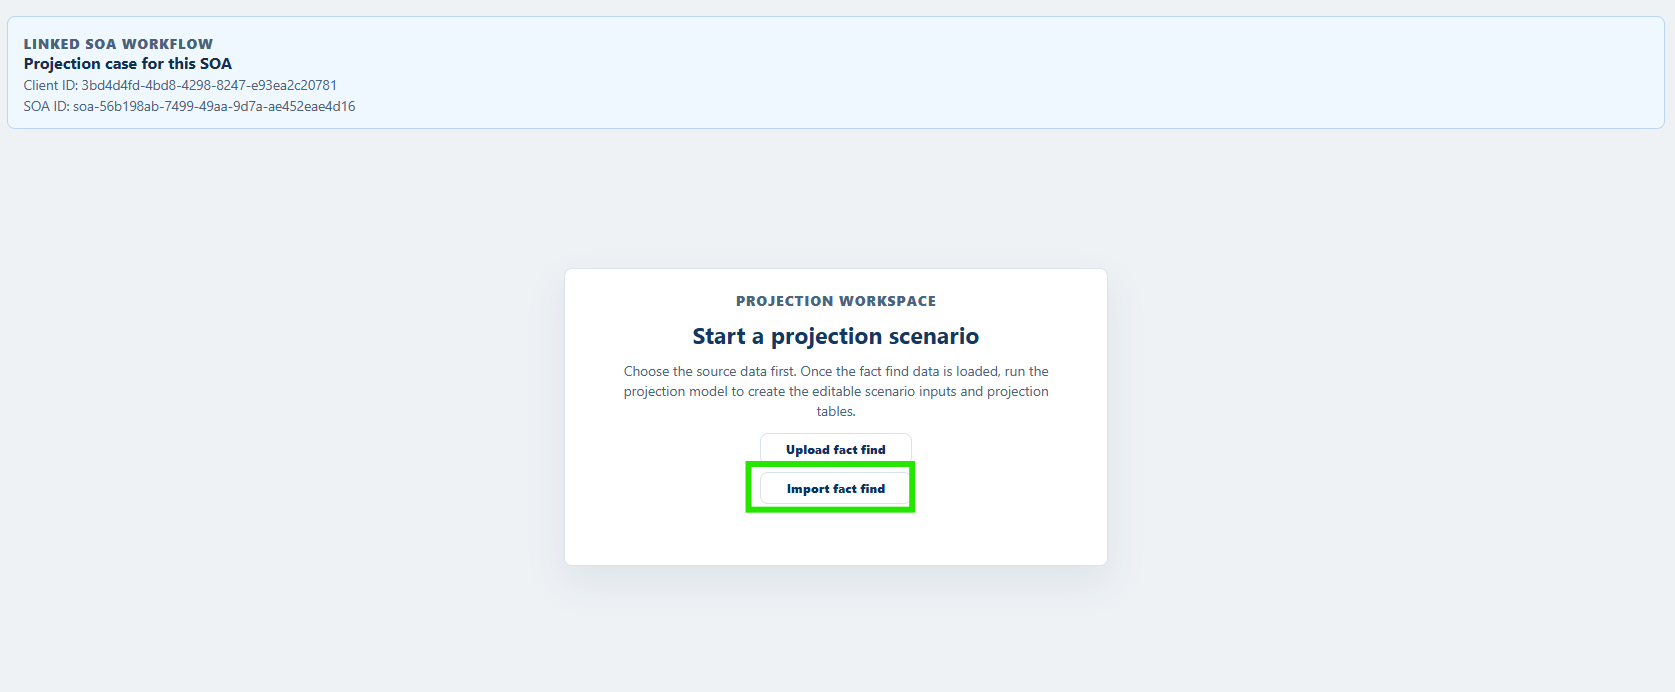
Click ‘Import Fact Find’ to pull through your Fact Find data into the Projections Workspace
‘Once the data is imported, click ‘Run Projections Model’
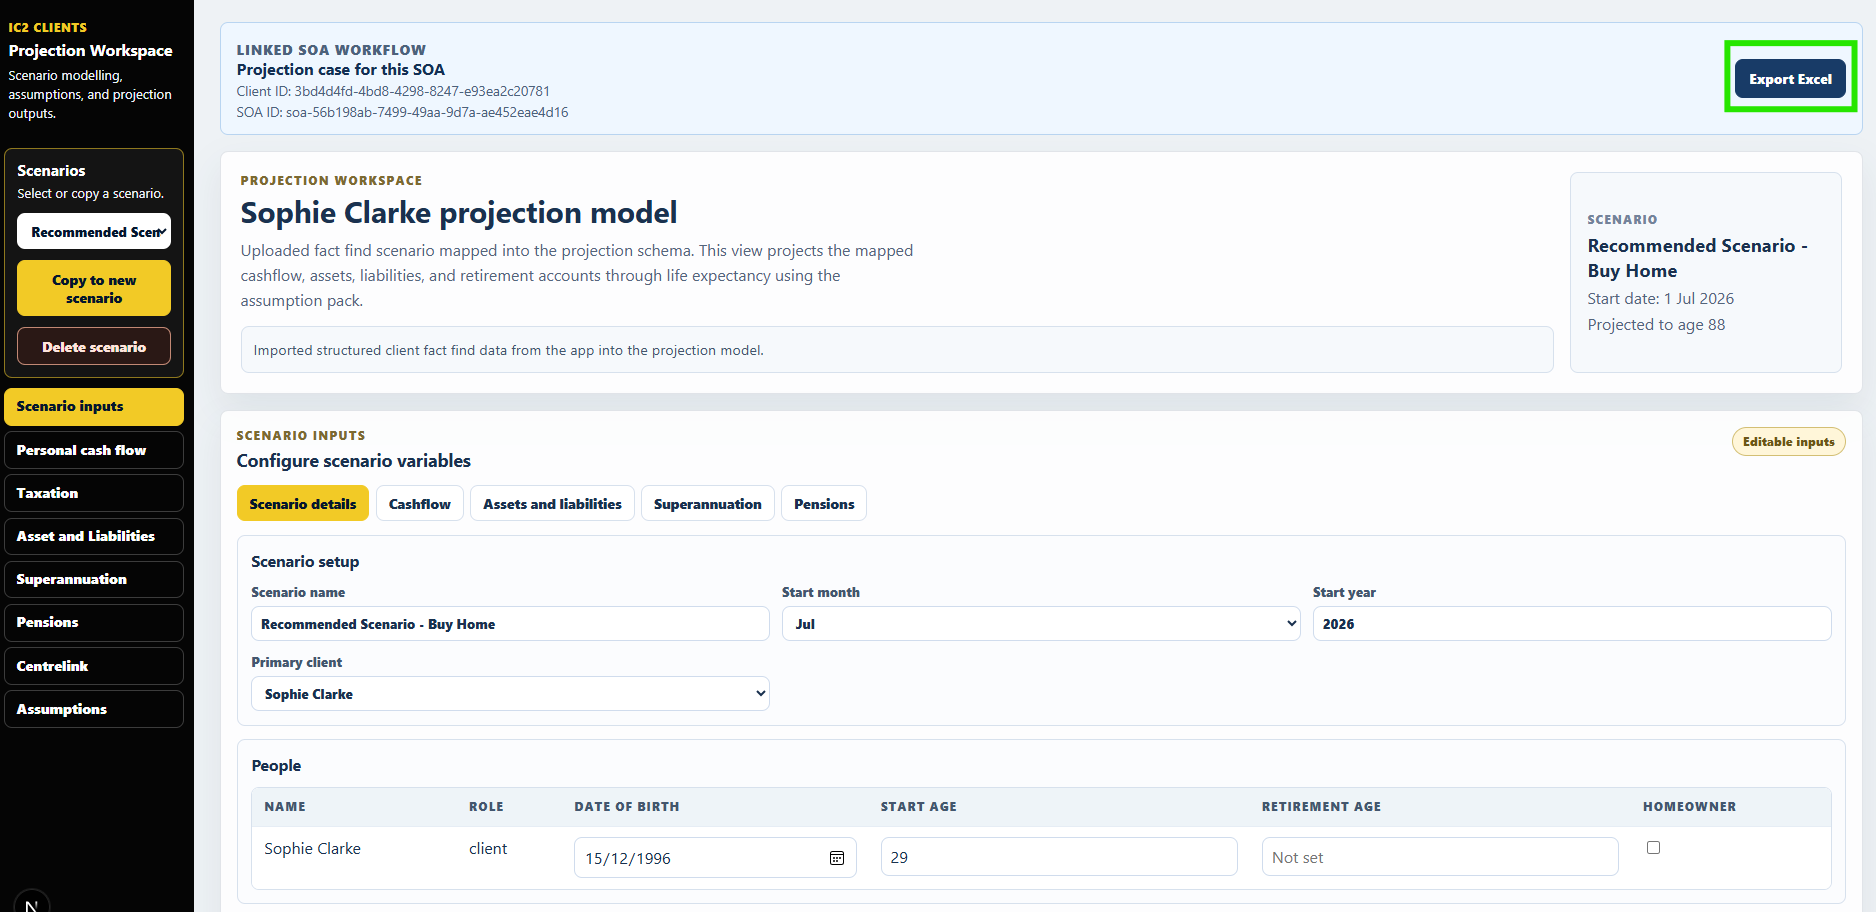
Step 3: Configure Scenario Variables
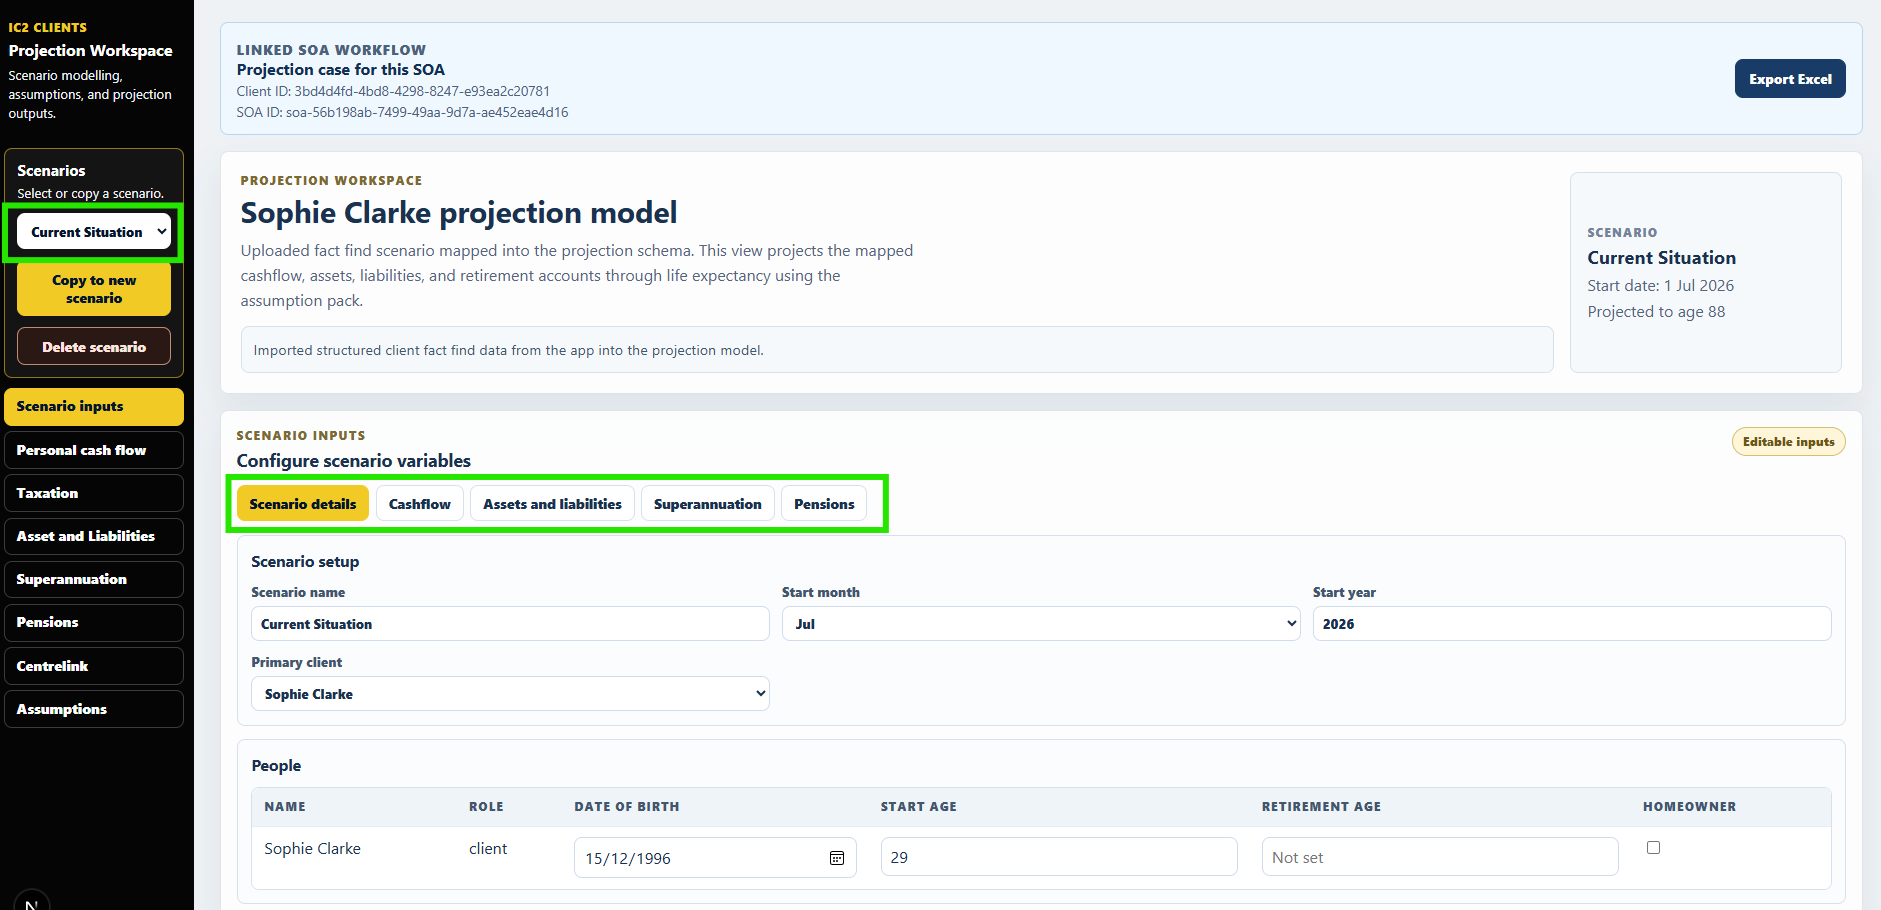
By Default, the projection Workspace will create a ‘Current Situation’ scenario.
Using the ‘Scenario Inputs’, you can configure your scenario variables to map out your client’s current financial situation, before creating any recommended scenarios.
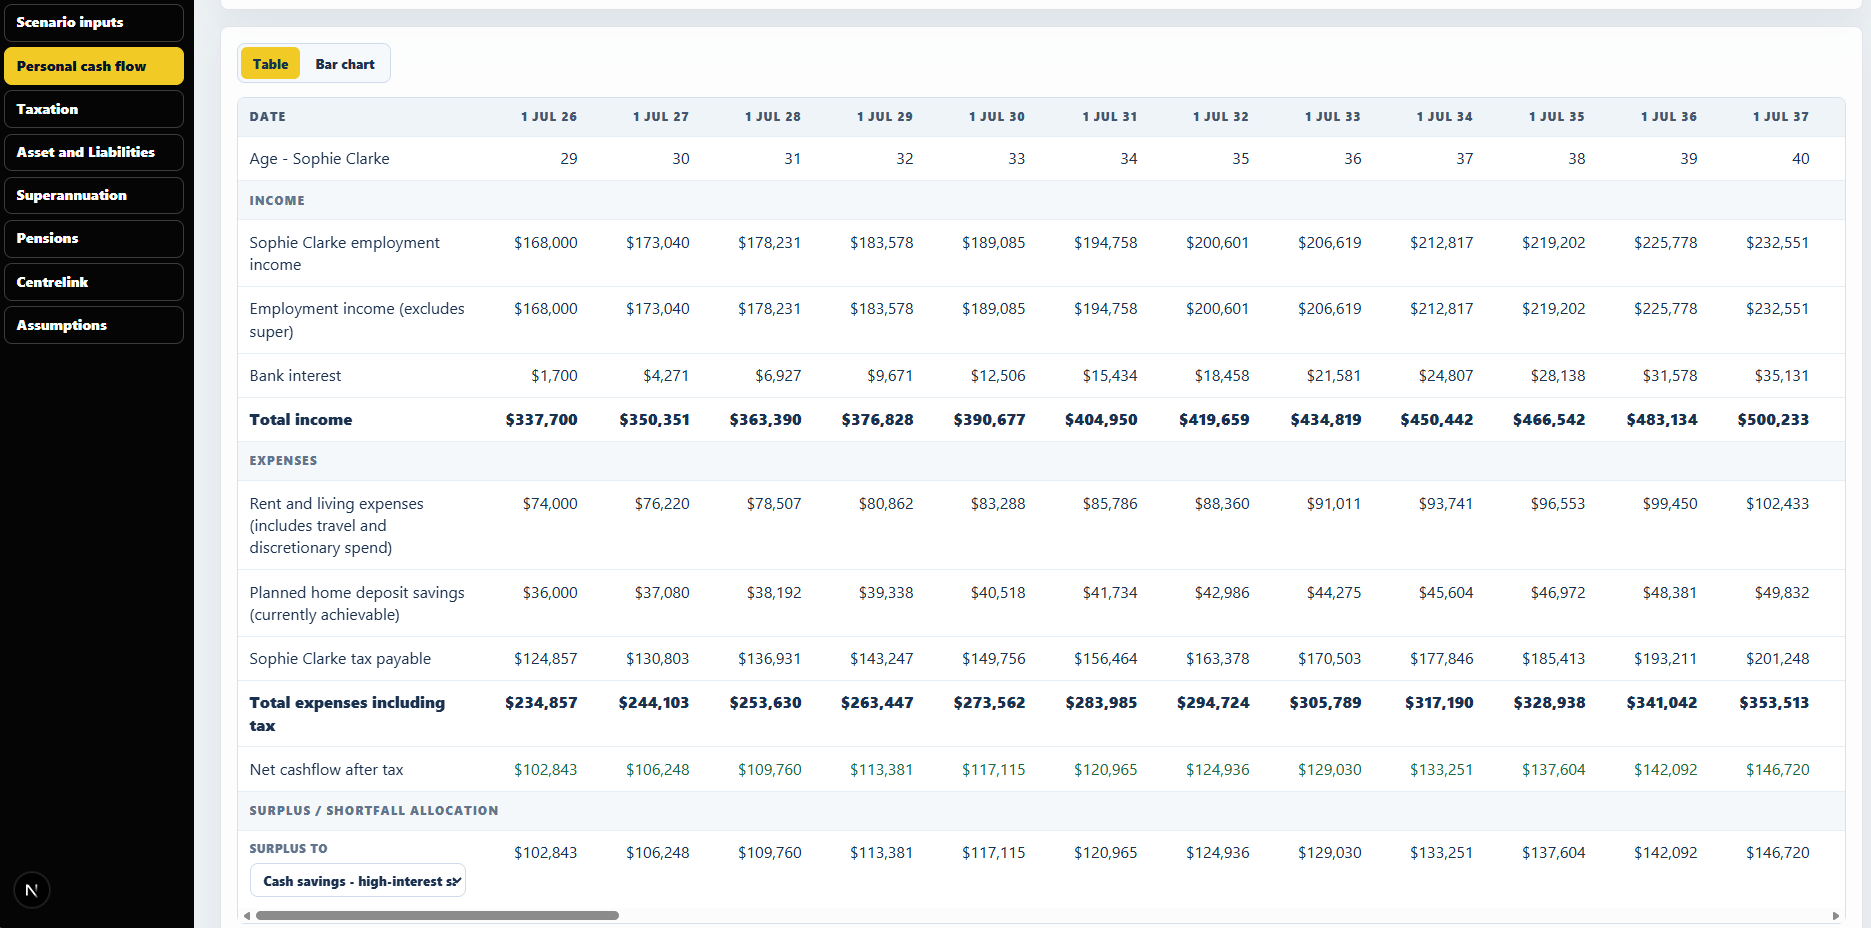
Step 4: Review The Projections
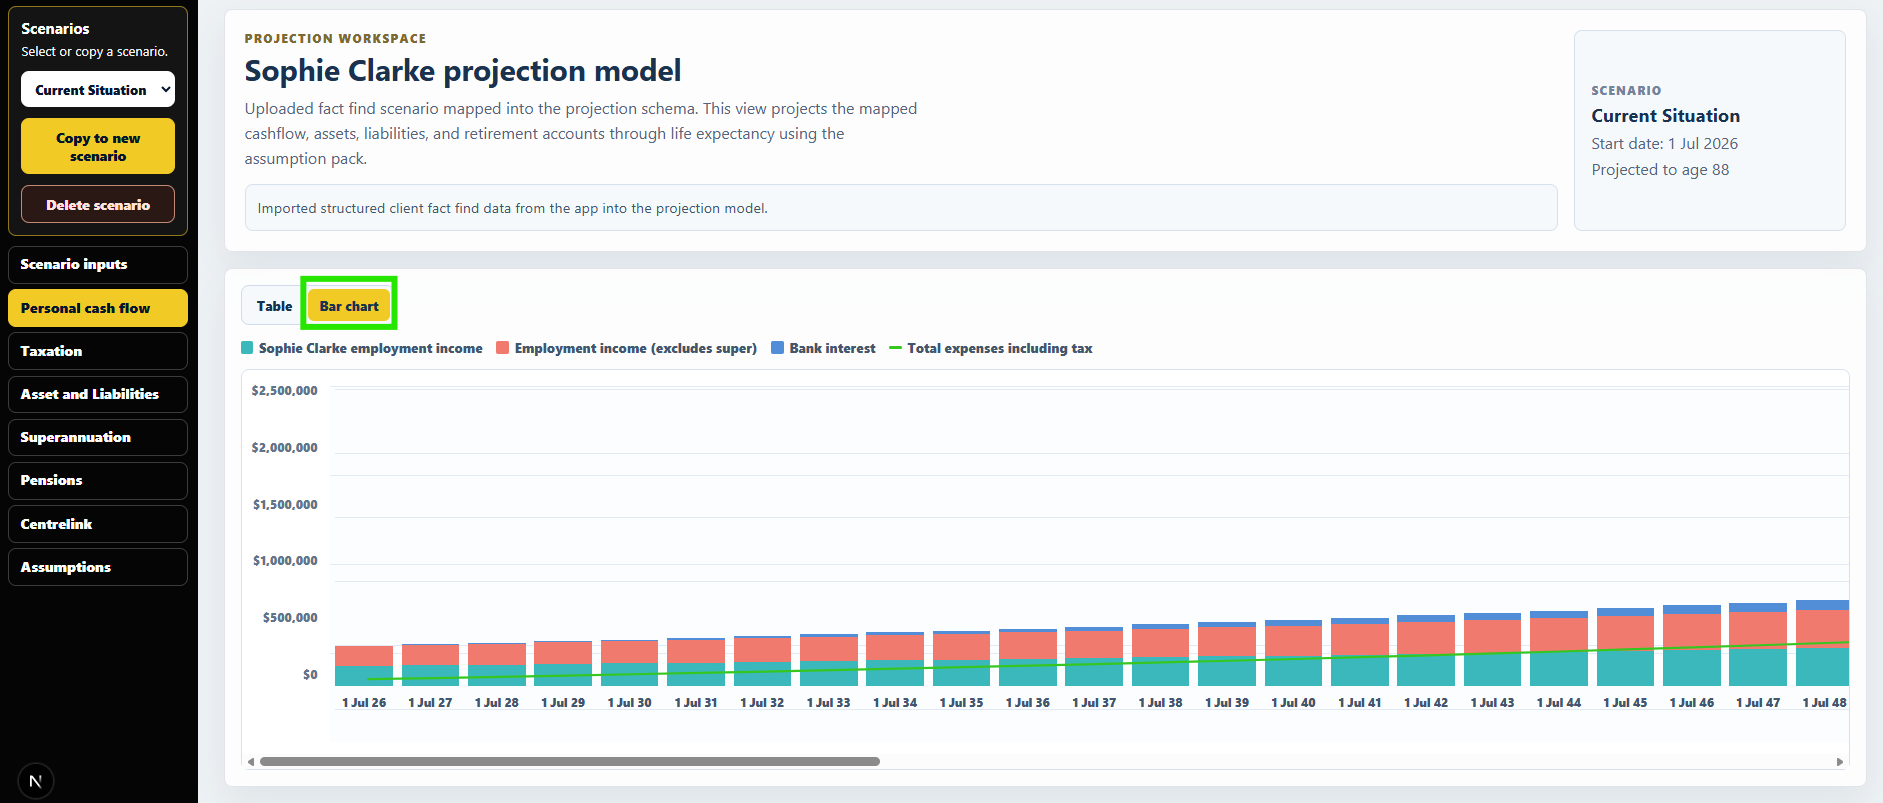
You can review the projection tables of your clients personal cashflow, taxation, assets and liabilities, super and pensions. You can also preview the charts using the Table/Bar Charts toggle.
Step 5: Creating A New Scenario
Once your client’s current situation is correctly configured, you can create a new scenario by clicking ‘Copy to new scenario’ in the left menu.
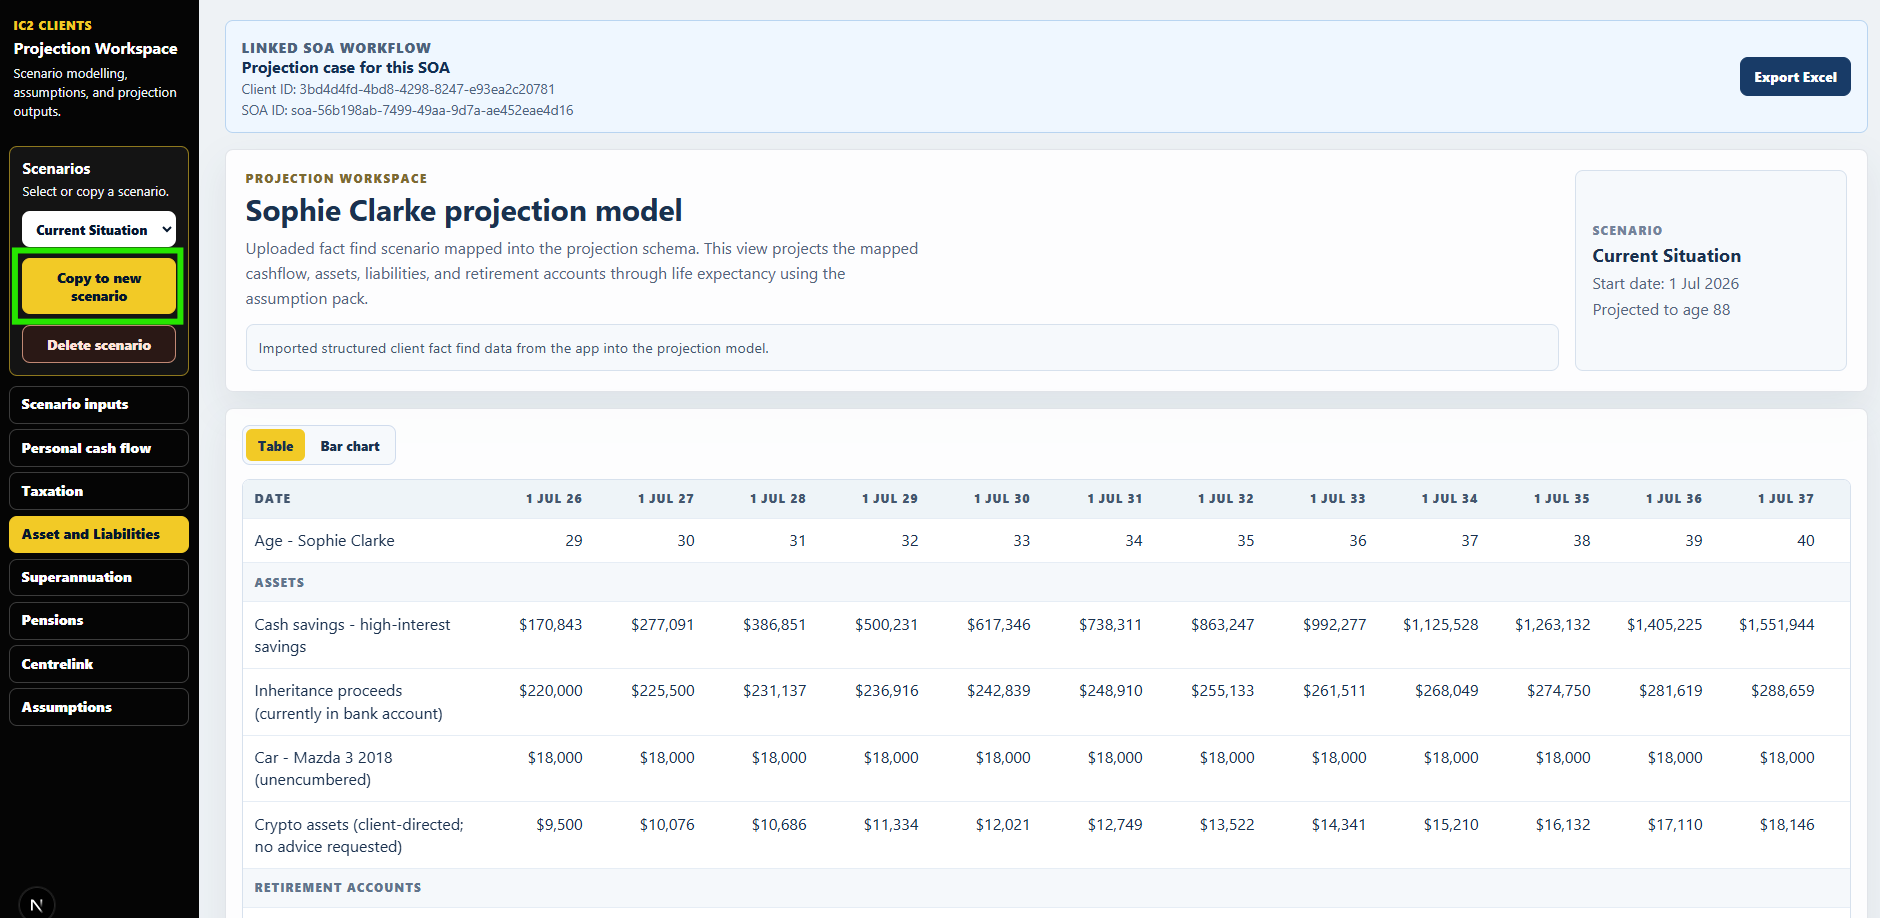
Copy to new scenario
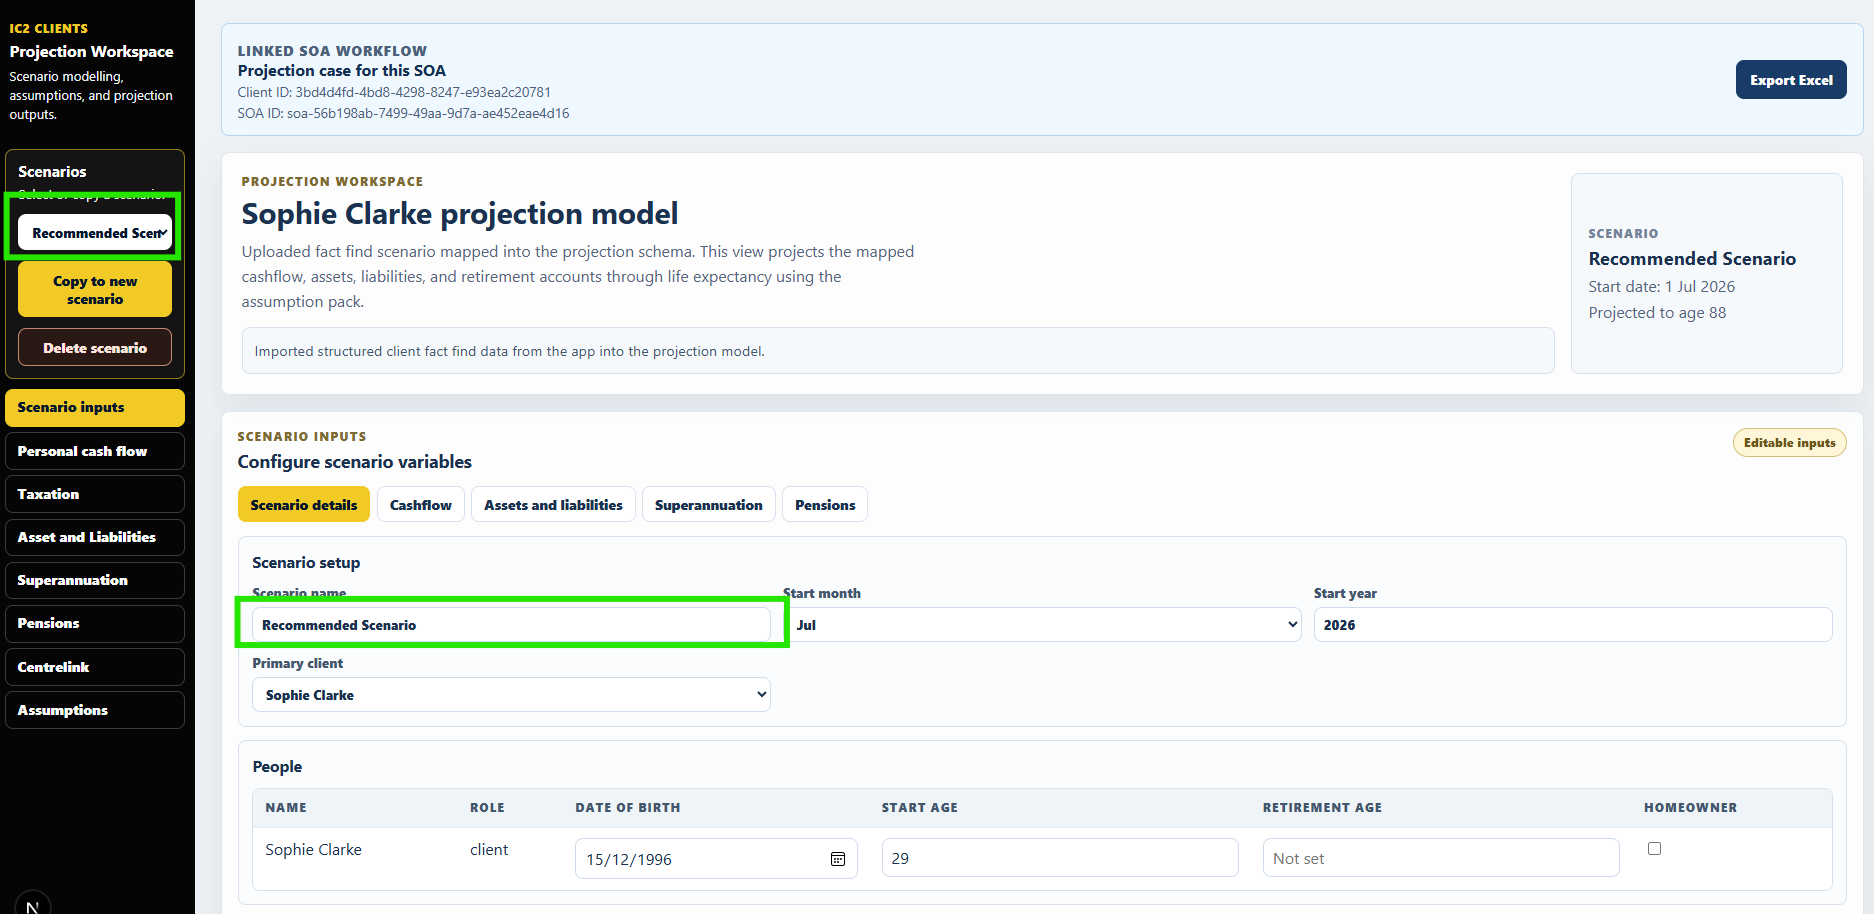
Give your new scenario a name e.g. Retirement Planning
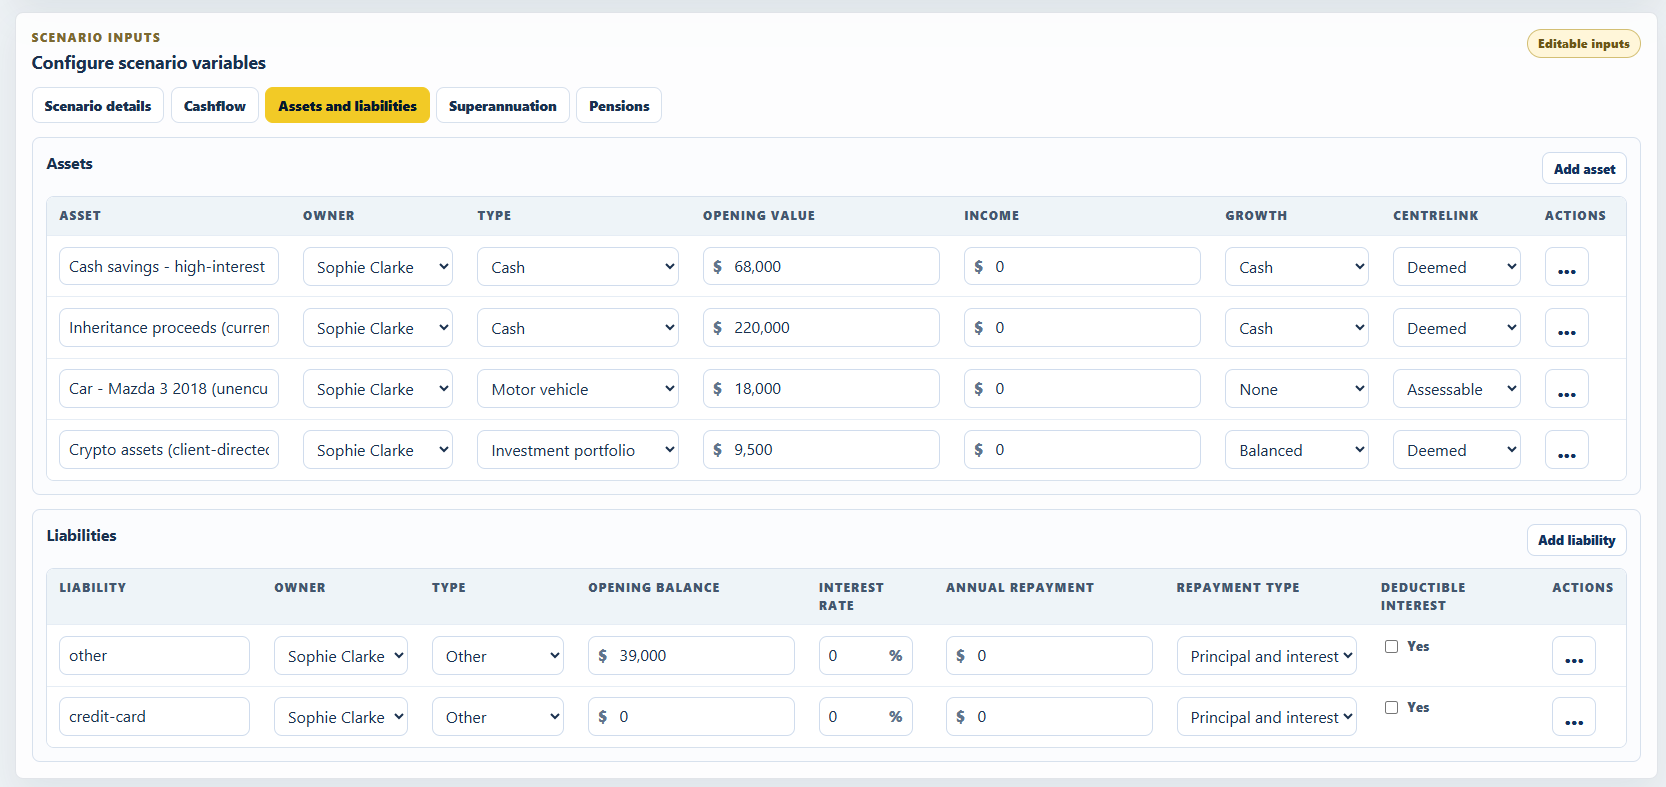
Step 6: Configuring Your New Scenario
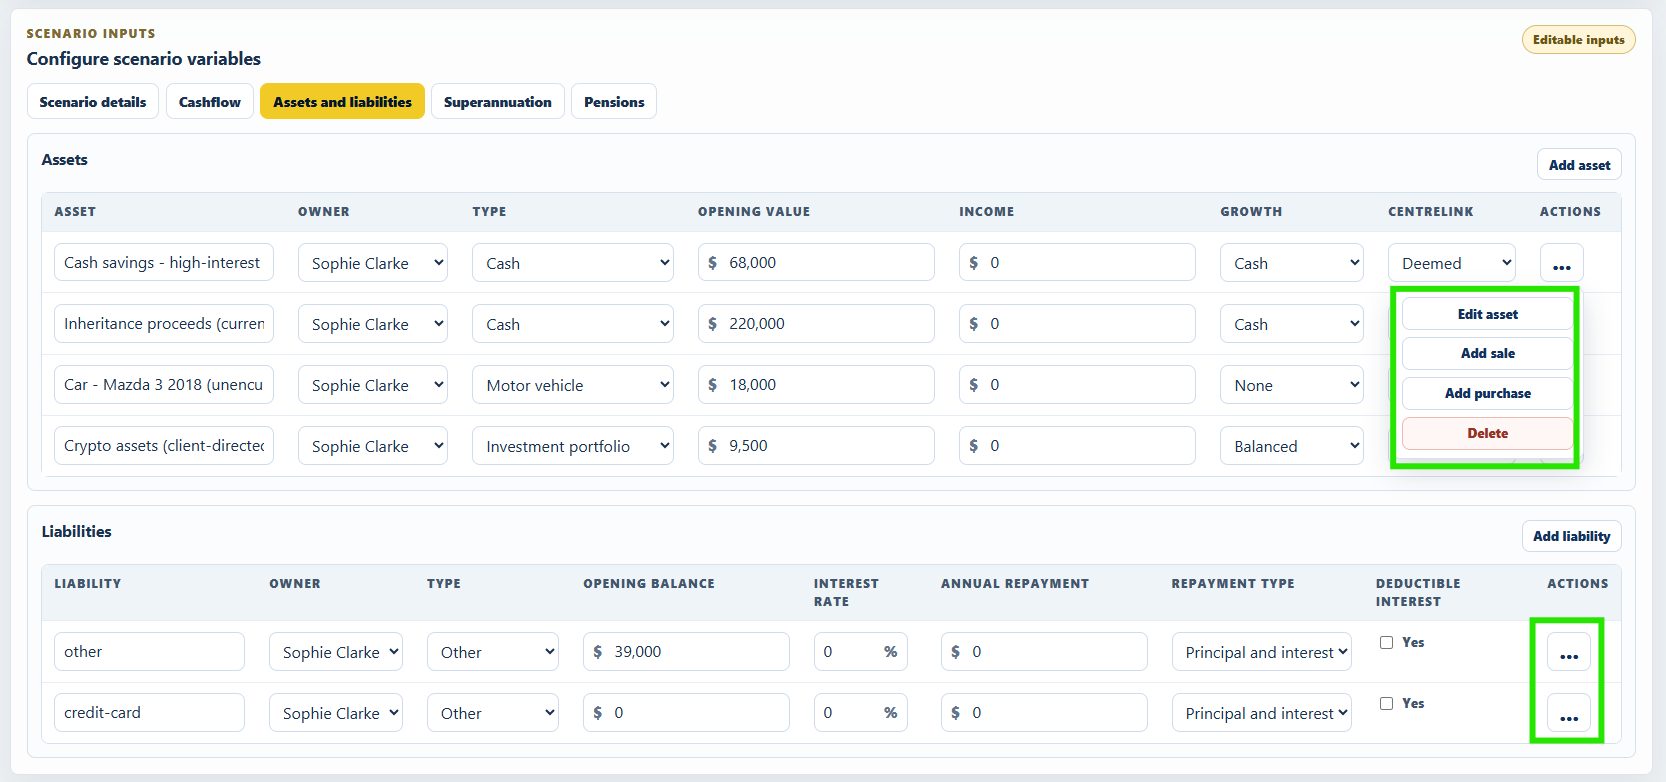
Update assets, add an asset, sell an asset, add or drawdown on a loan and make lump sum repayments
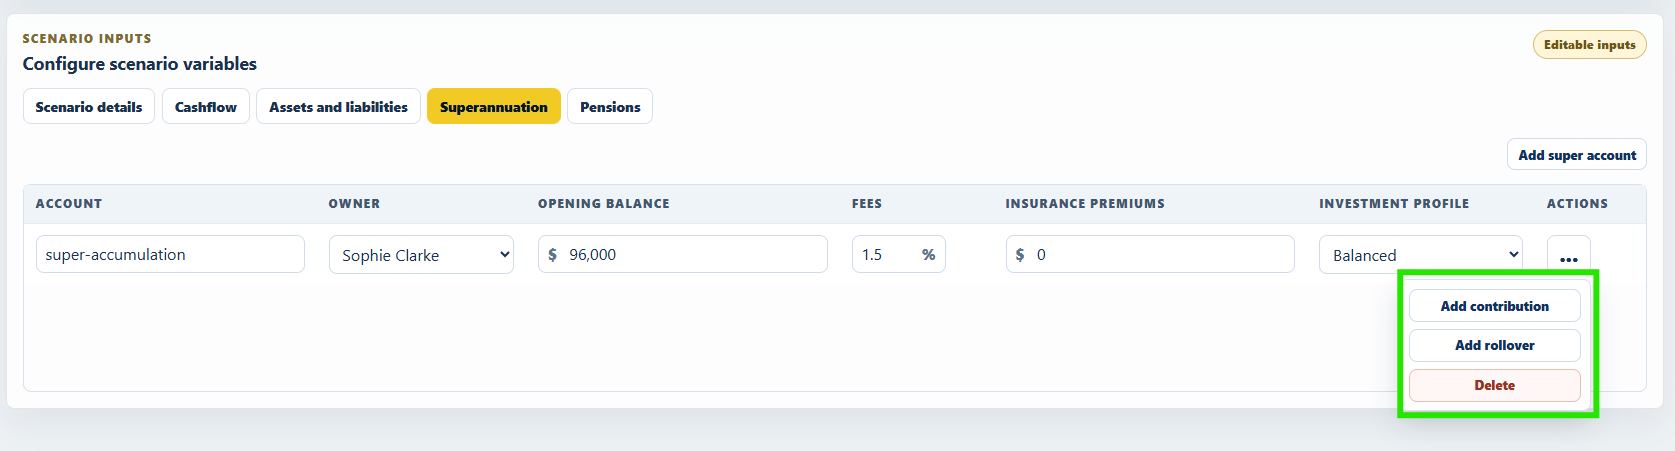
Add super contribution strategies or rollover to pension
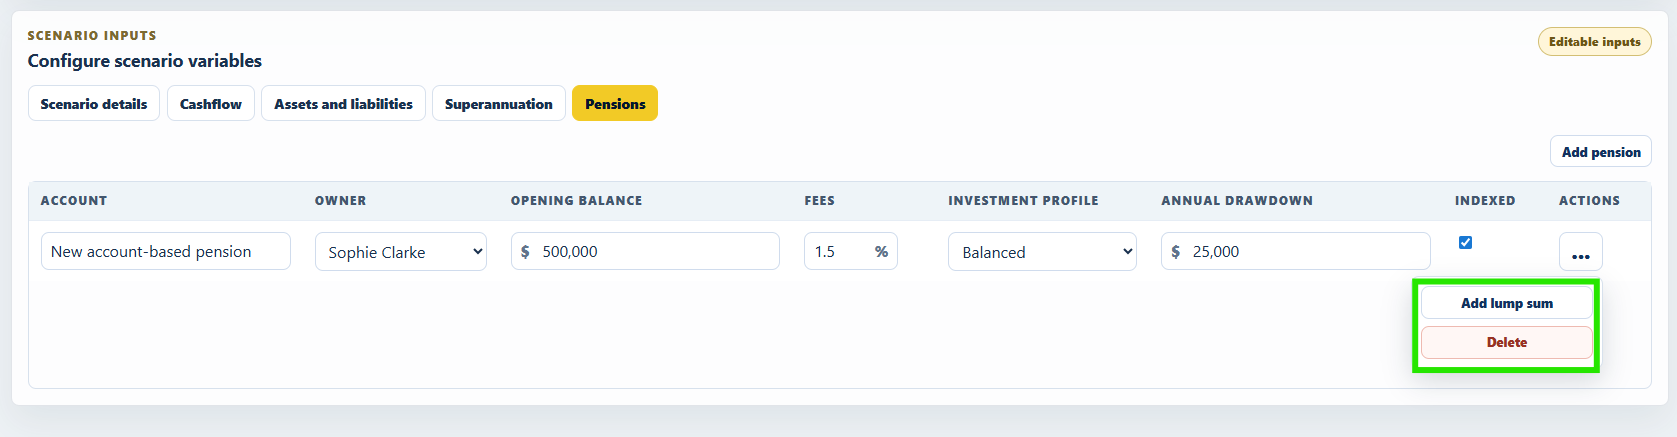
Make lump sum pension withdrawals
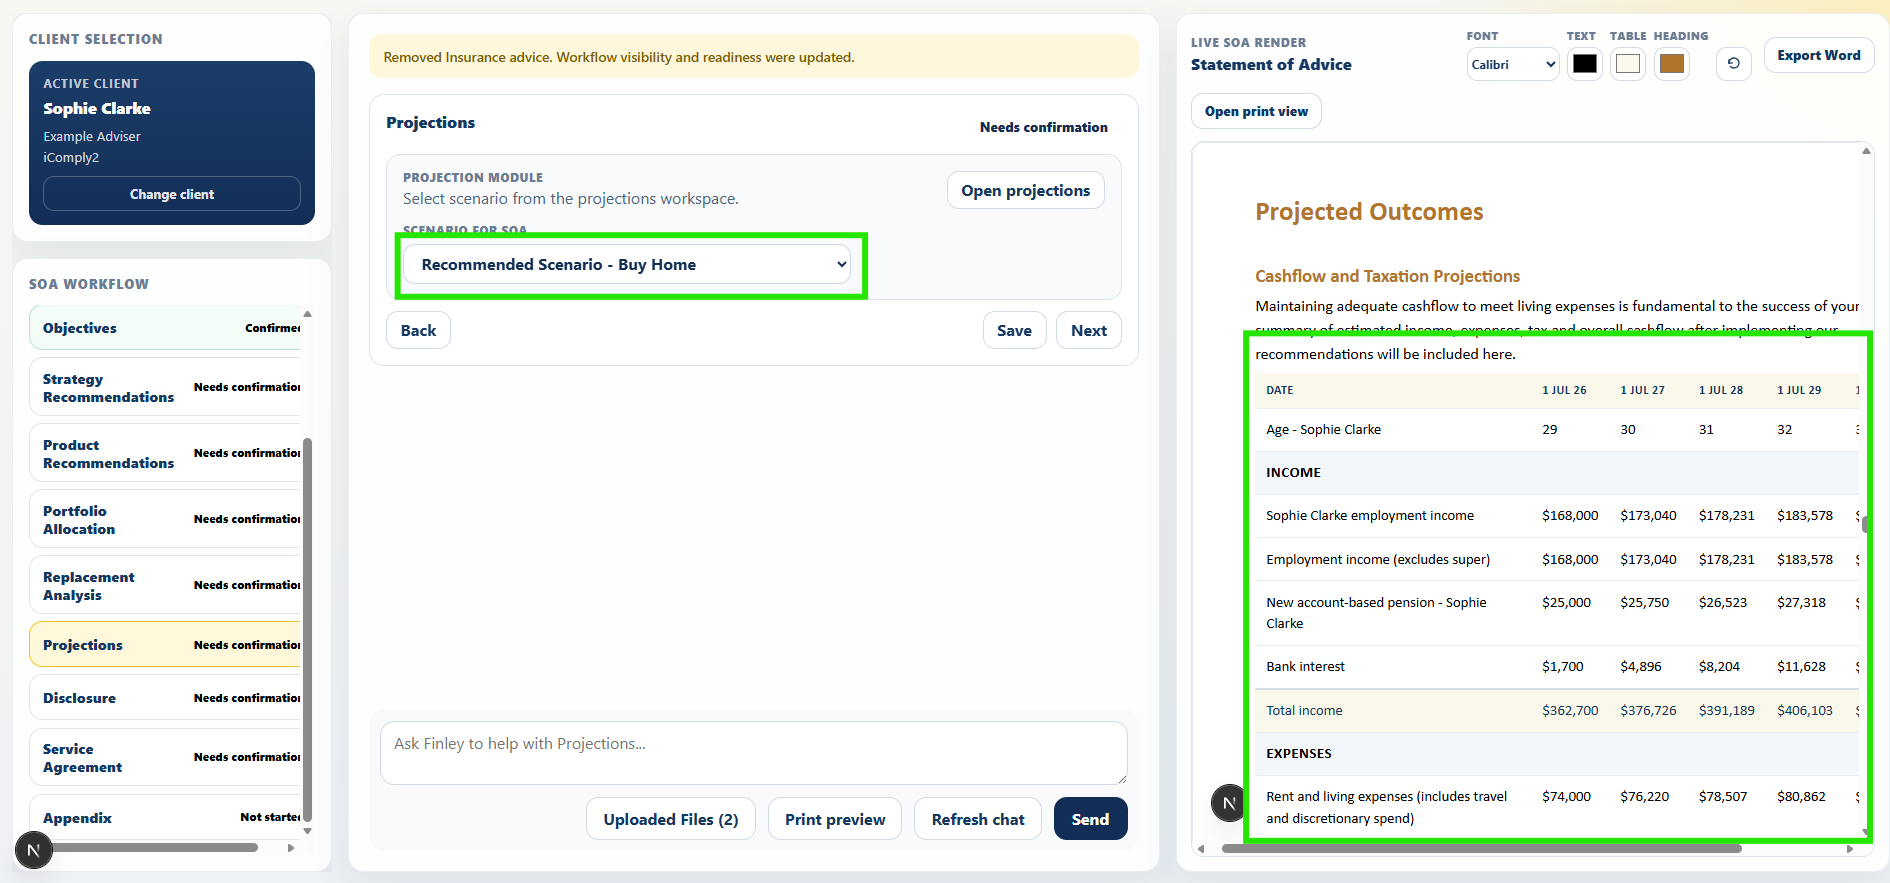
Step 7: Pull Your Scenario Into Your SOA
Once you have finished building your projections, you can pull your scenario back into your SOA using the Projections card.
Select the scenario form the dropdown to pull the cashflow table and assets and liabilioties chart int your SOA. Other supporting tables and charts will be populated into the appendix.
Exporting To Excel
You can export your scenario to excel and retain for supporting documentation in your file.