

Using the Finley AI Console
Step 1: Select the client or create a new client
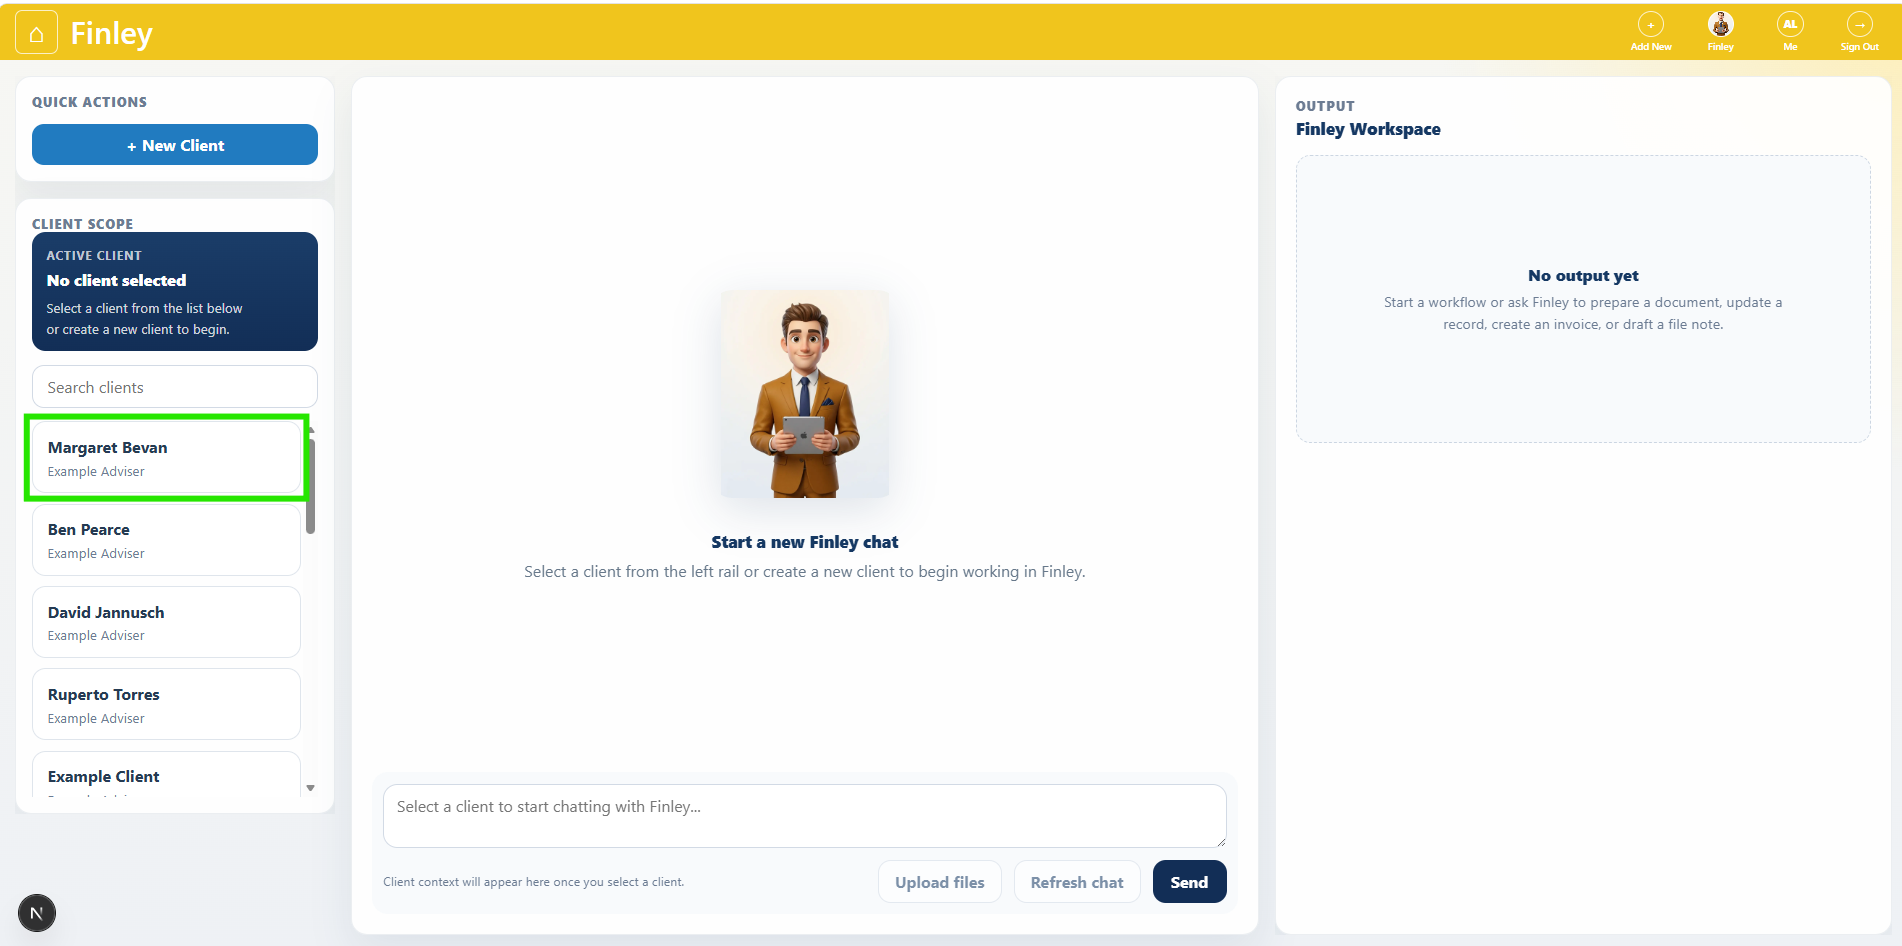
Select your client from the client list in the left menu
or, create a new client using the + New Client button
Step 2: Upload Supporting Documents
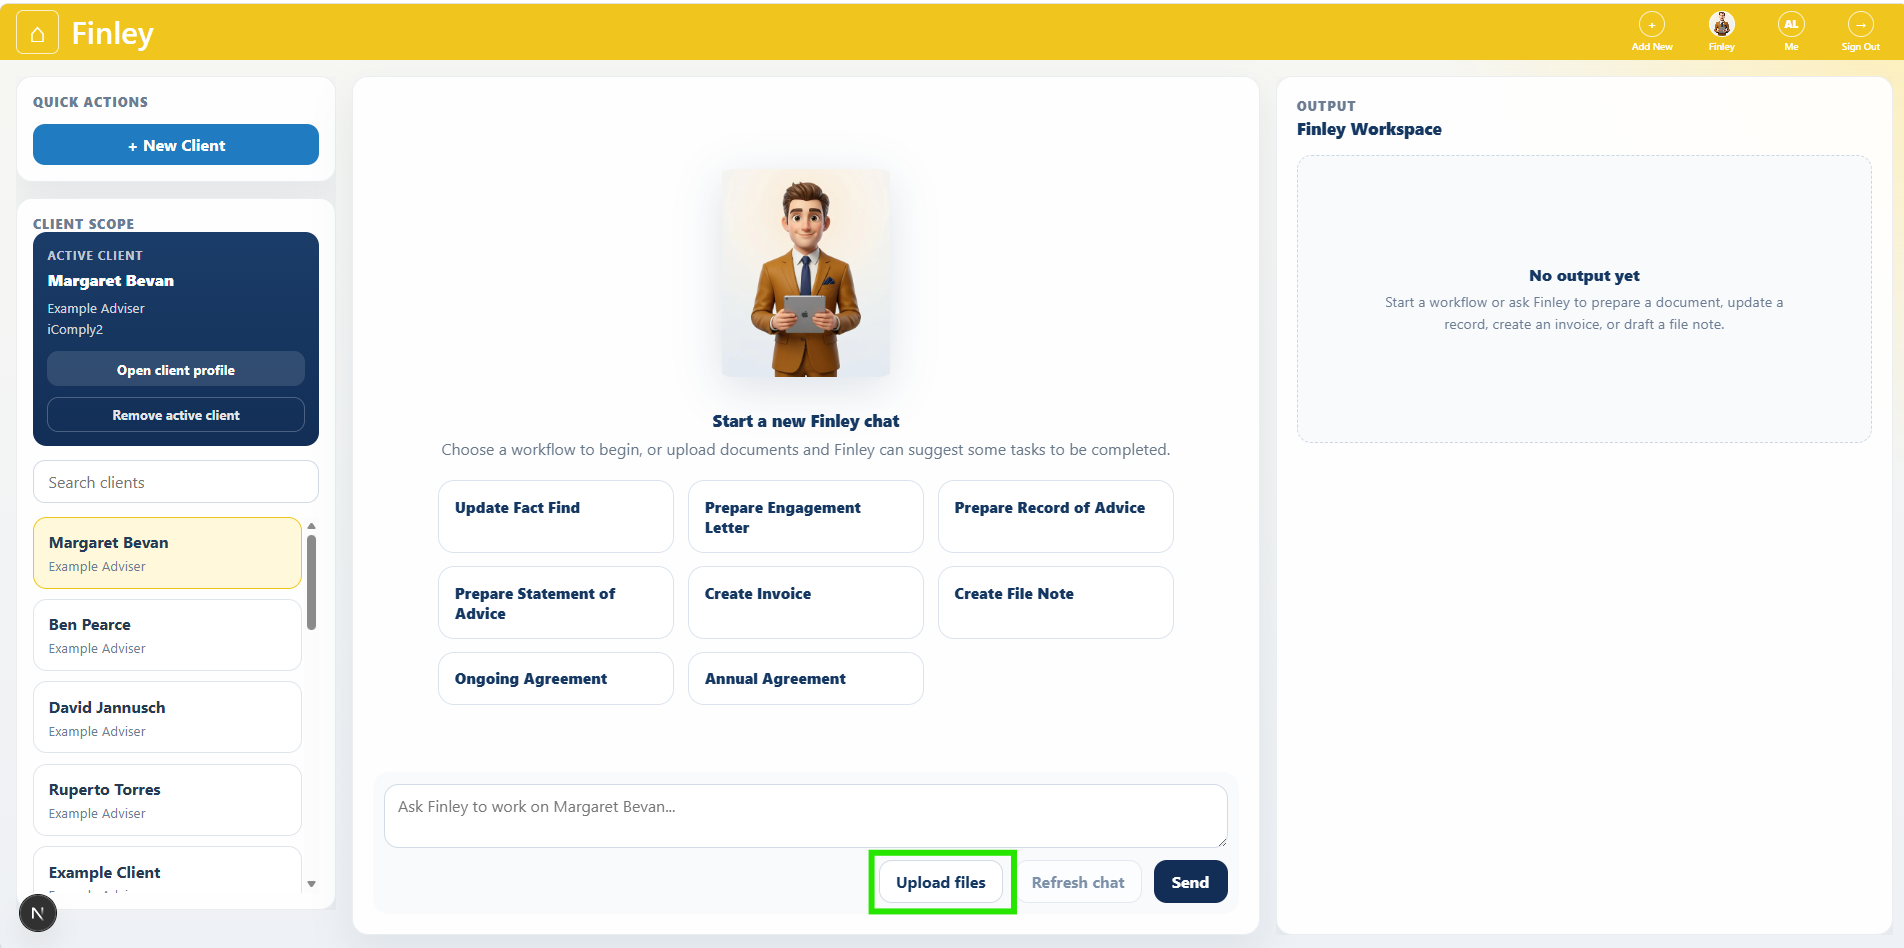
Use Upload files button to add source documents, such as:
Fact Find
File notes
Strategy paper
ProductRex reports
Insurance quotes
Research documents
Fee consent or engagement documents
Finley will analyse these documents, to be used as context to assist in completing tasks.
Step 3: Selecting a task
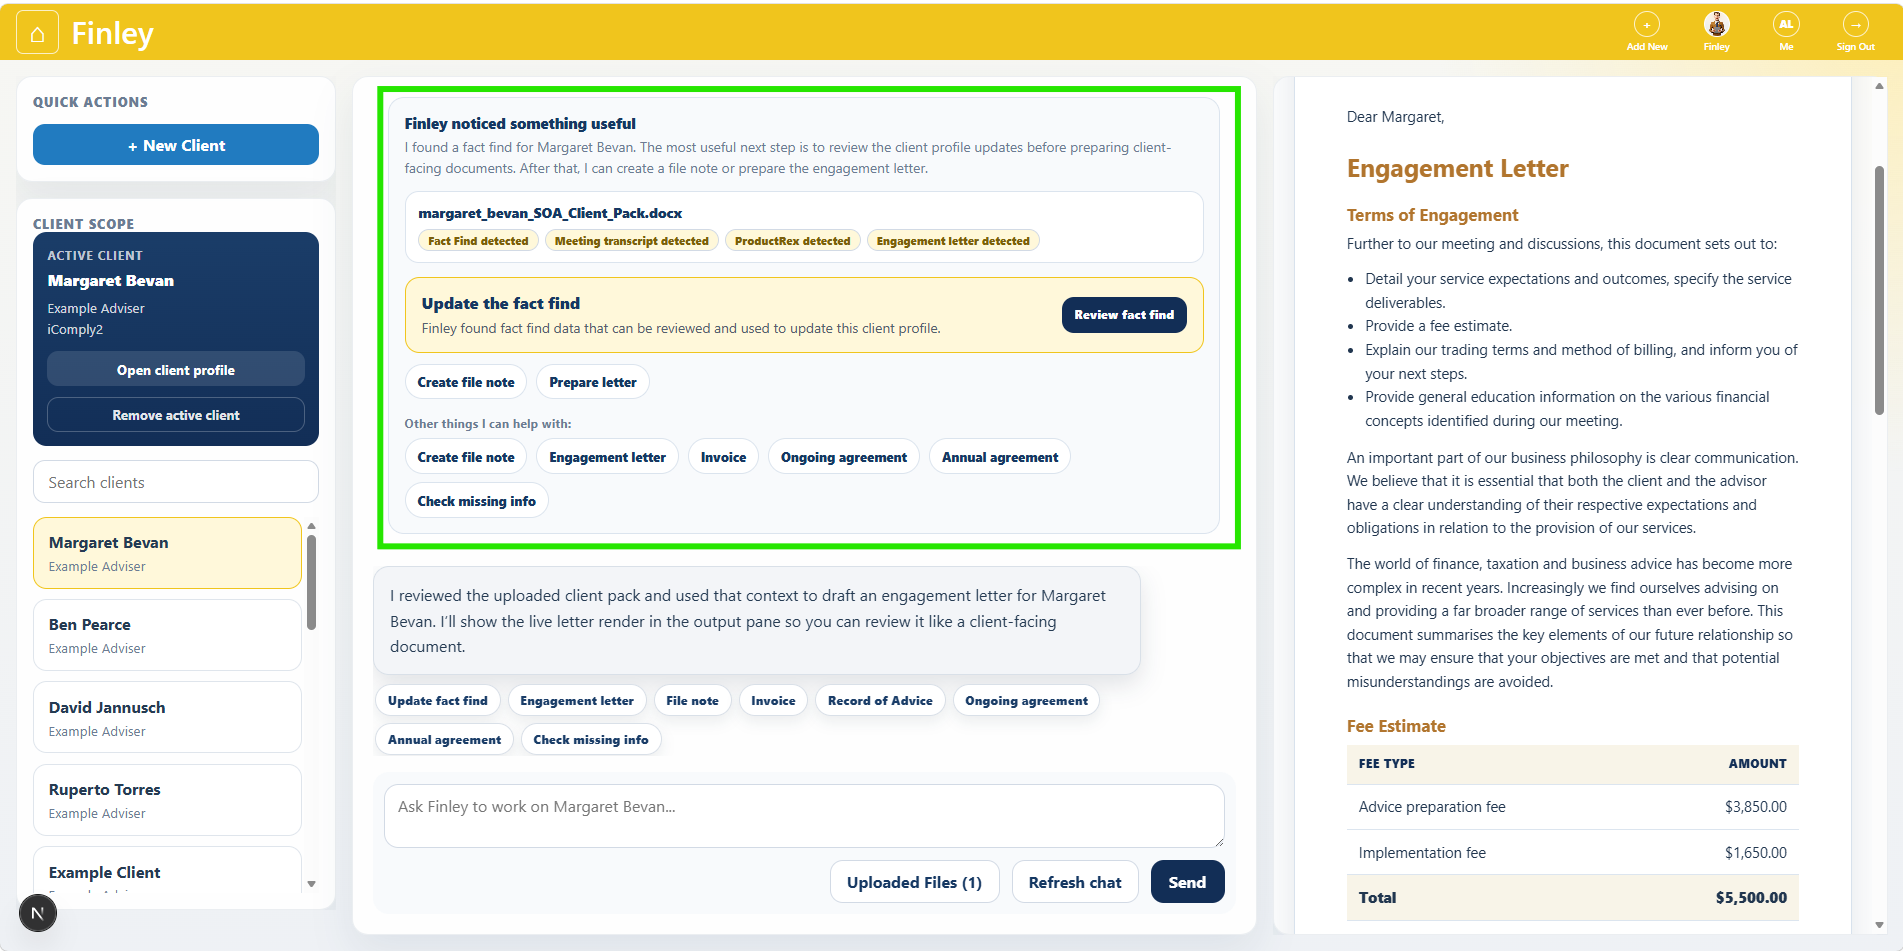
Based on the documents uploaded, Finley will suggest tasks to be completed. Using the Finley console, you can
Update the client Fact Find
Draft and crate file notes
Draft an engagement letter
Draft Ongoing or Fixed Term Agreements
Raise an invoice
Prepare a Record of Advice
Using Chat To Refine Sections
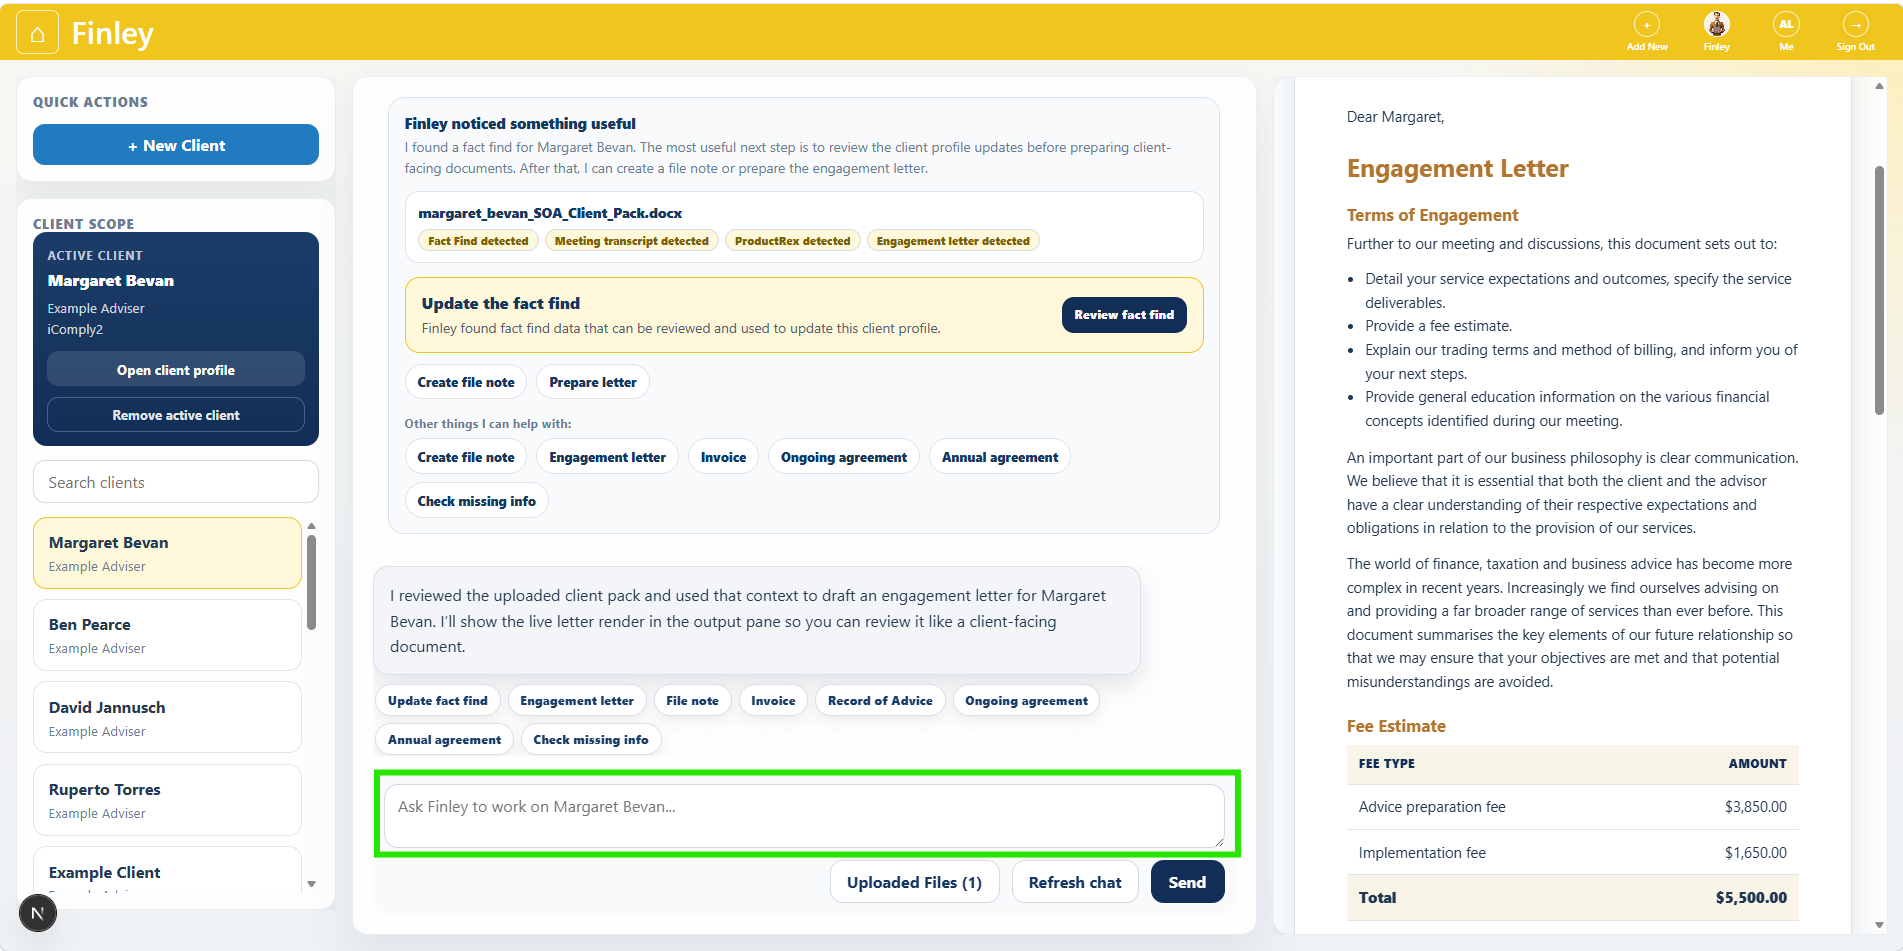
While working on a document, you can ask Finley to improve or rewrite content.
Once completed, you can export the document to word or refresh the chat to start working on a new client.