Completing An SOA In Finley SOA Workspace
Step 1: Create the SOA Scenario
1. Open The Client
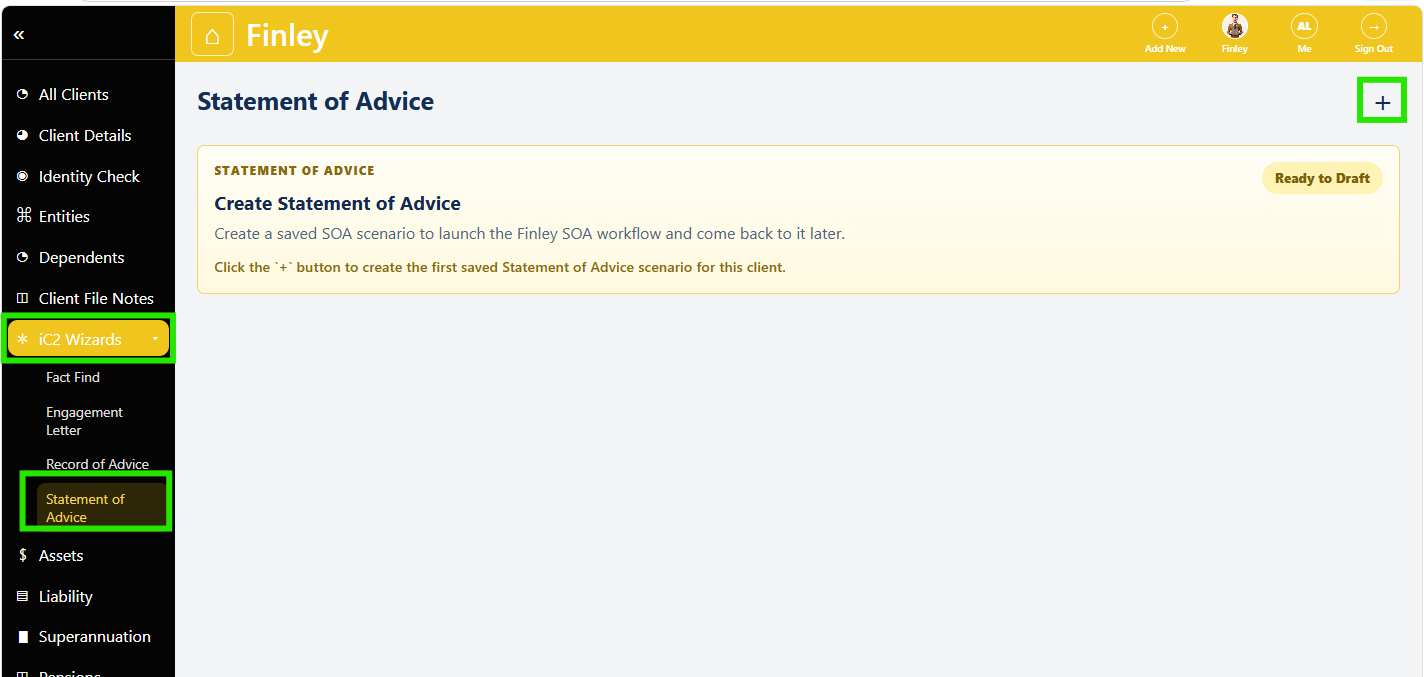
Go to the client profile, then open iC2 Wizards → Statement of Advice.
2. Create Or Open An SOA Scenario
Click the + button to create a new SOA scenario.
Give it a clear name, for example:
“Retirement Advice - May 2026”
Step 2: Upload Supporting Documents
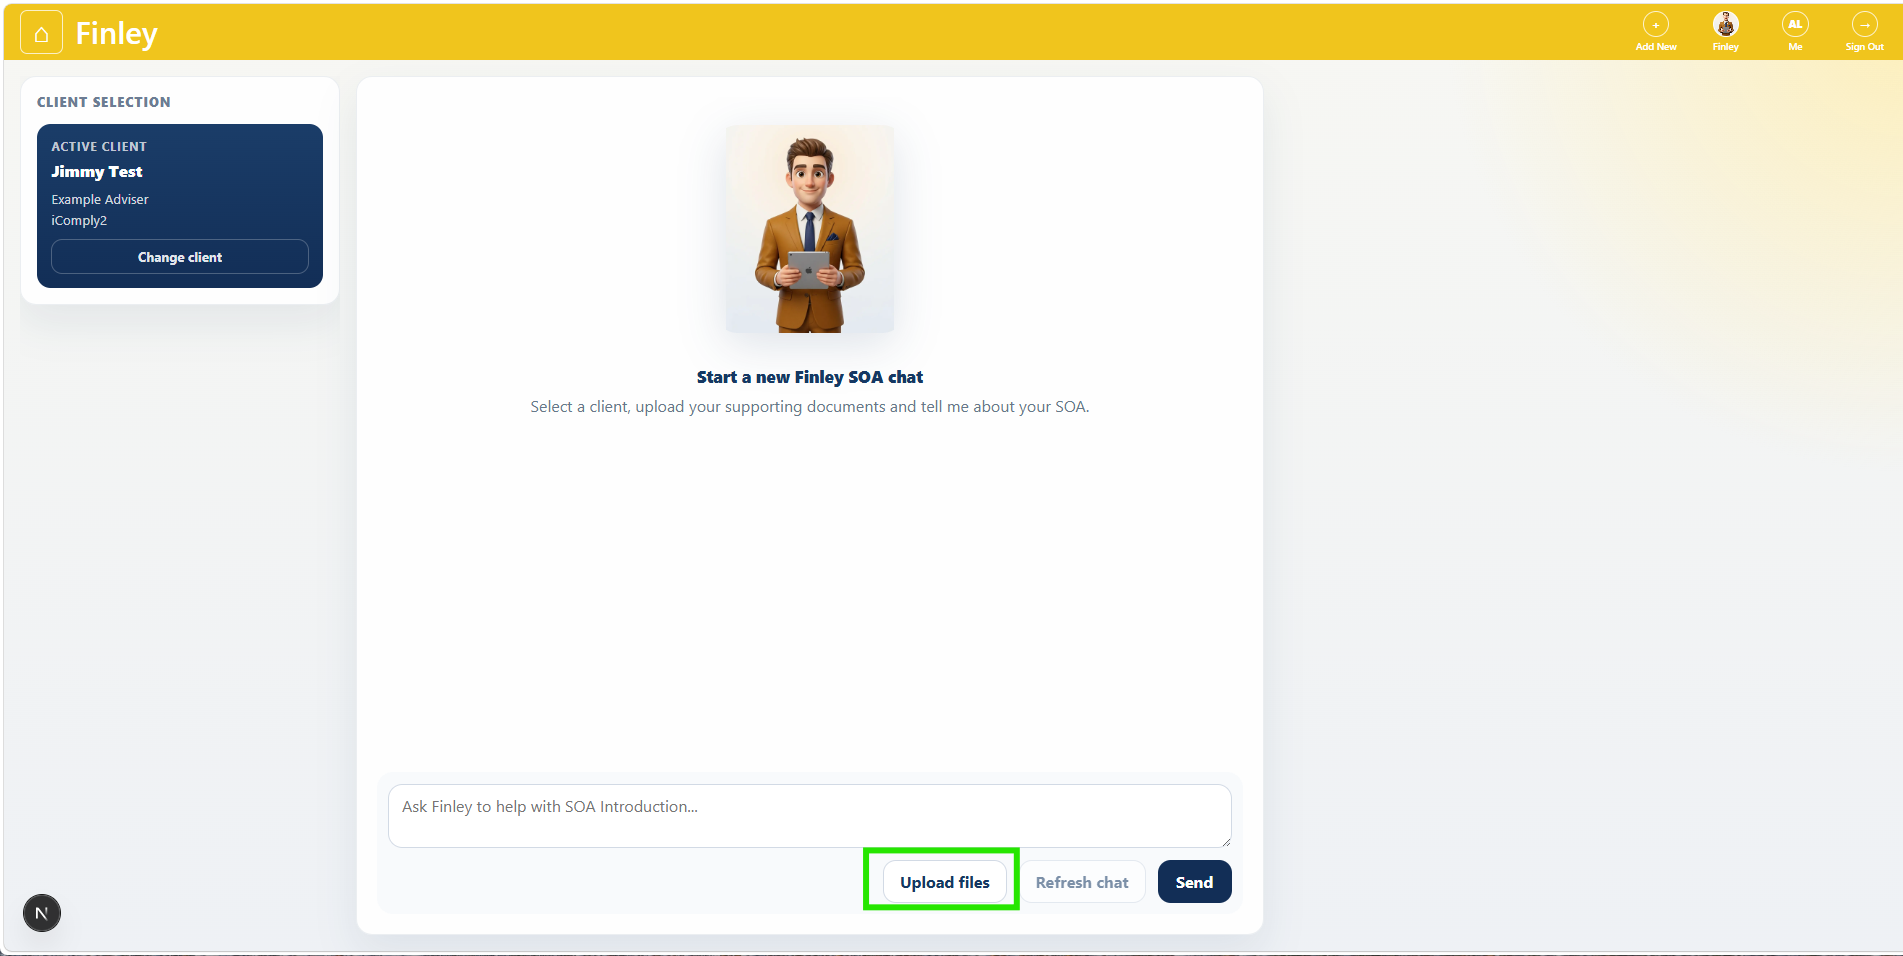
Confirm The Active Client
Finley will open the SOA workspace with the client name in the Client Selection pane
Use Upload files button to add the relevant SOA source documents, such as:
Fact Find
File notes
Strategy paper
ProductRex reports
Insurance quotes
Research documents
Fee consent or engagement documents
Step 3: Providing Further Instructions
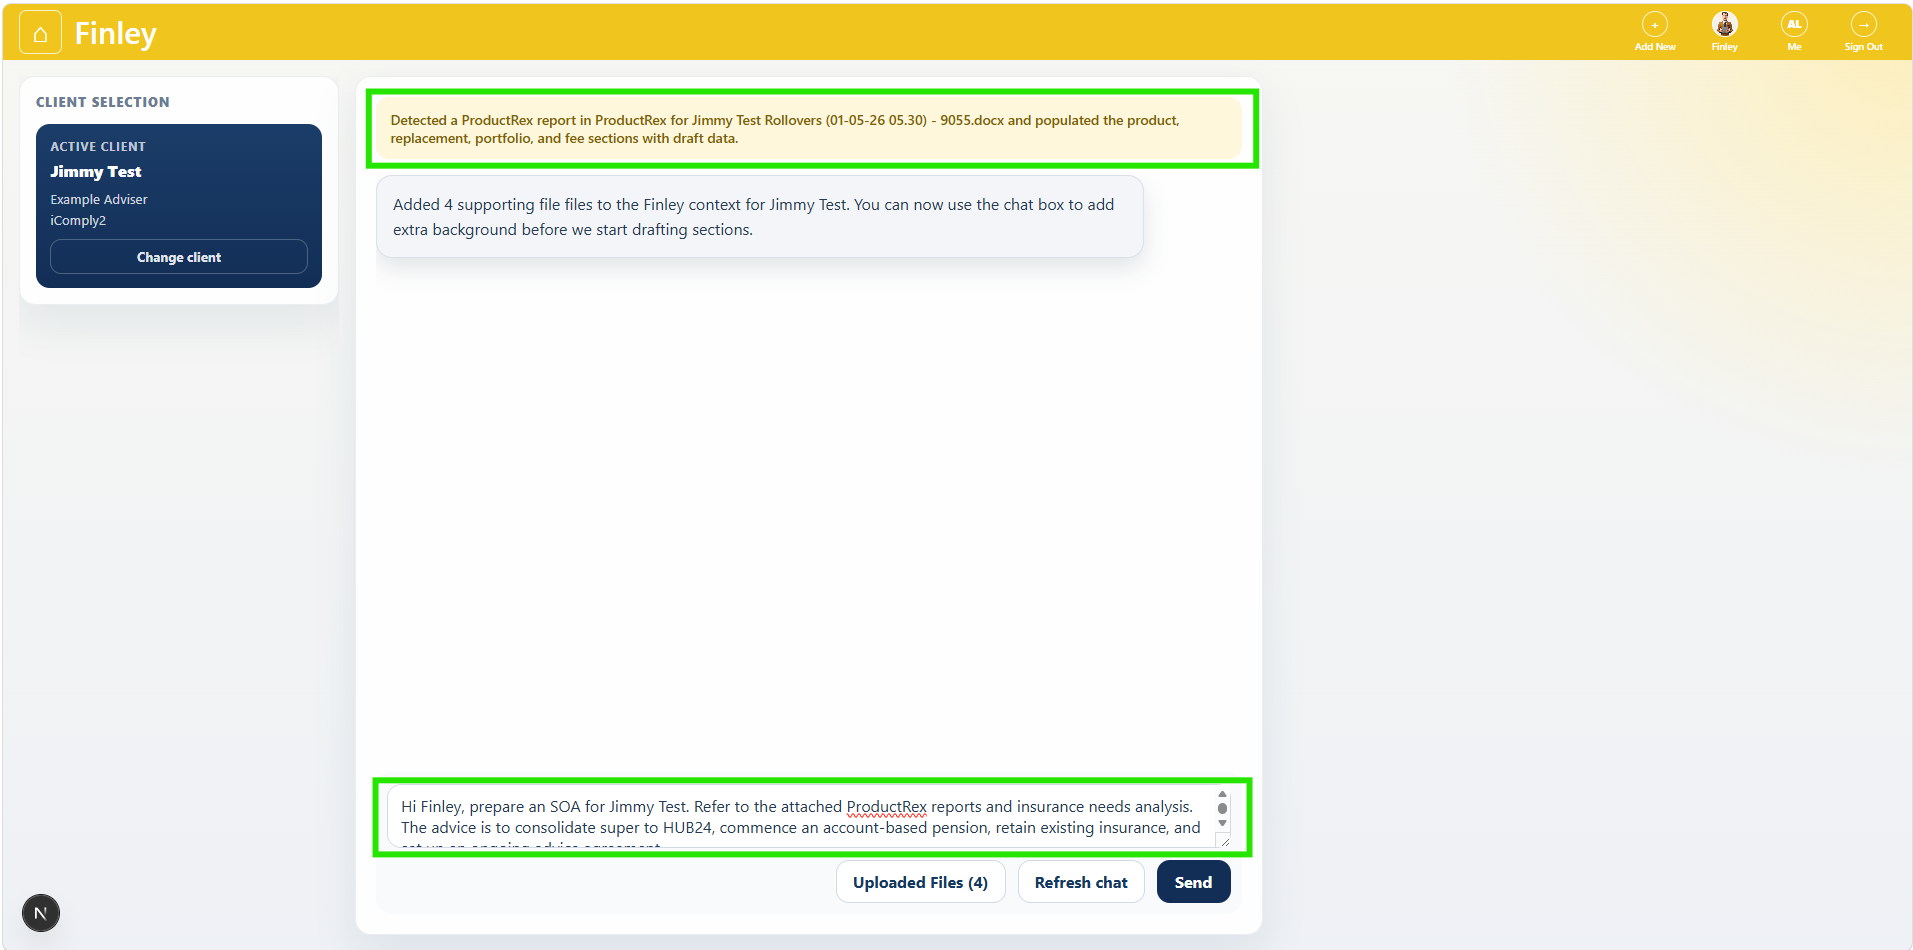
Finley will detect certain document types automatically, such as Fact Find detected or ProductRex detected.
Map Fact Find Data (If Needed)
If a fact find is uploaded, click Map to profile. Finley will extract the data and populate the client fact find. Review the extracted data, then click Apply to client profile if the mapping is correct. This updates the fact find before the SOA is drafted.
Tell Finley What The Advice Is About
In the chat box, describe the SOA Request in plain English.
Make sure you cover off on advice scope, recommendations, product advice, upfront and any ongoing fees and any other information.
Include anything important that may not be obvious from the documents.
Click Send
Step 4: Review Finley’s Intake Summary
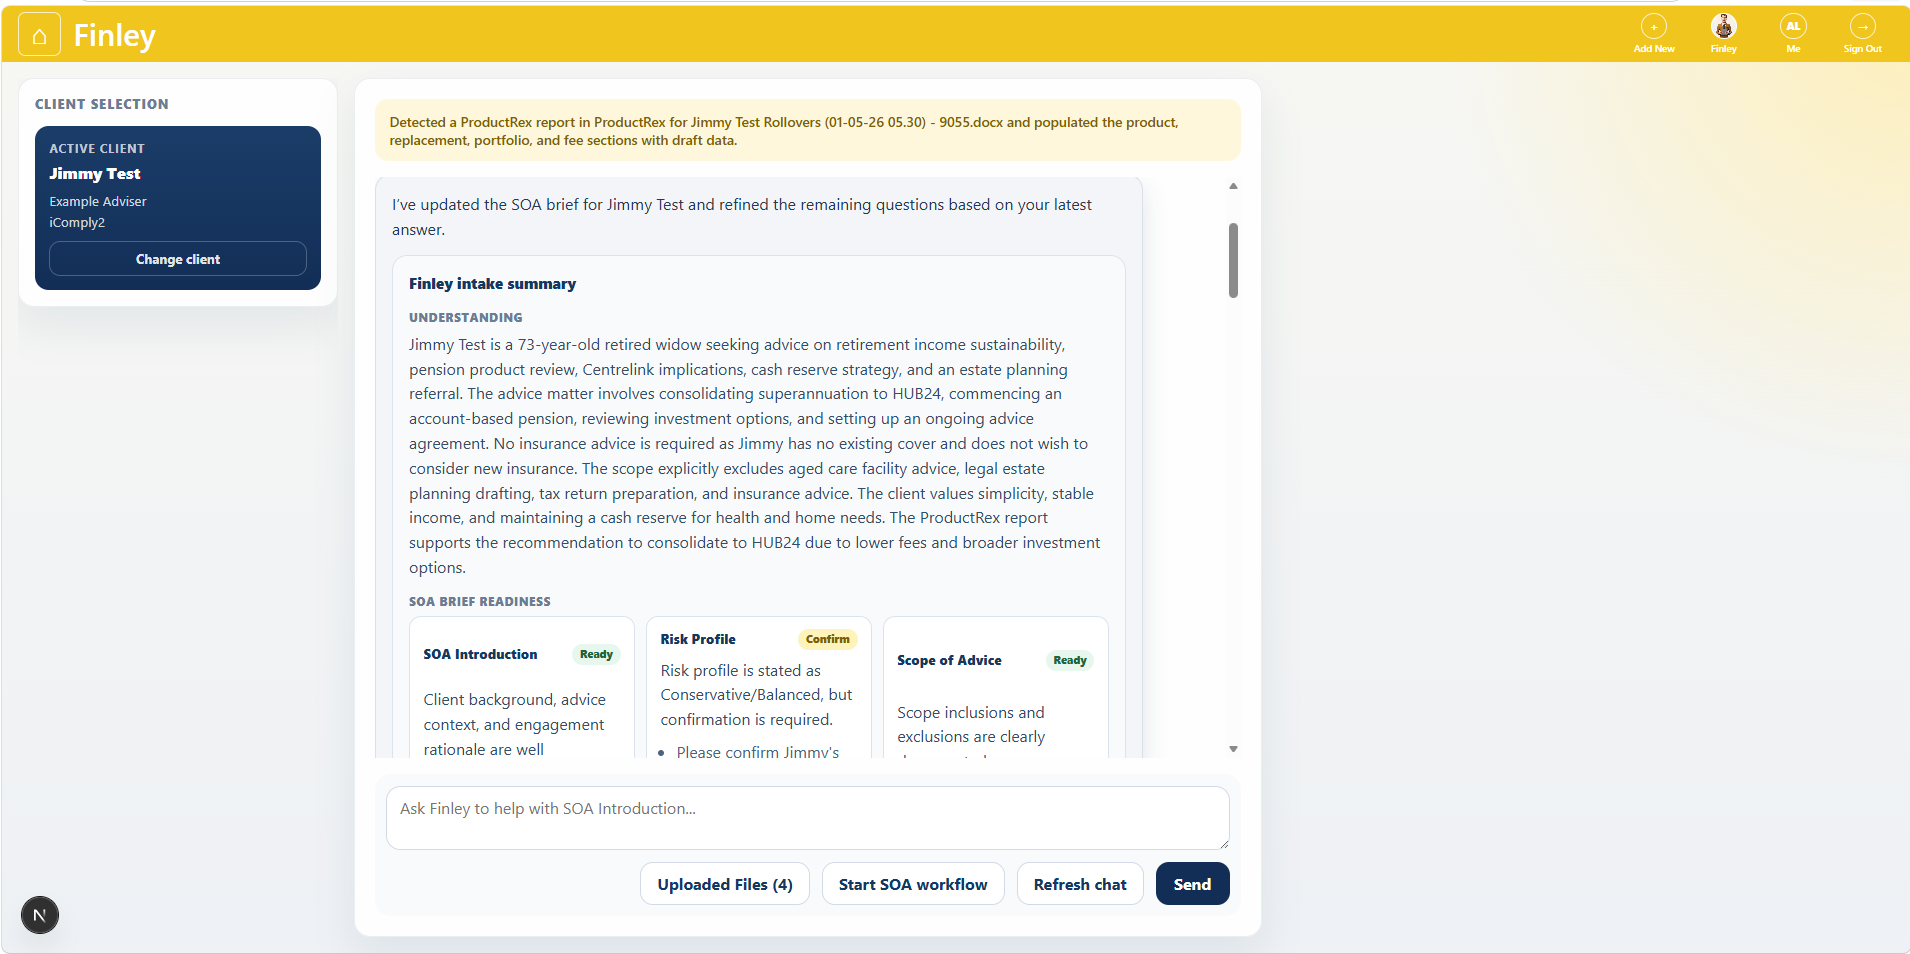
Finley will produce an intake summary showing:
Understanding of the request:
Likely advice modules
Client objectives
Missing information
Document insights
Evidence-backed confirmations
Select The Advice Modules
Review the suggested modules and turn modules on or off as needed.
Typical modules include:
Strategy advice
Product advice
Replacement advice
Portfolio advice
Insurance advice
Projection analysis
Step 5: Answering Follow Up Questions

Finley will ask Follow-Up questions to clarify any missing pieces before preparing the SAO.
To answer a question, click on the Unanswered question. The question will appear in the chat box for your reponse.
Once you have answered the question, the question will move to the ‘Answered Questions’ section, and you can continue to resolve all of Finley’s follow up queries.
Step 6: Start The SOA Workflow
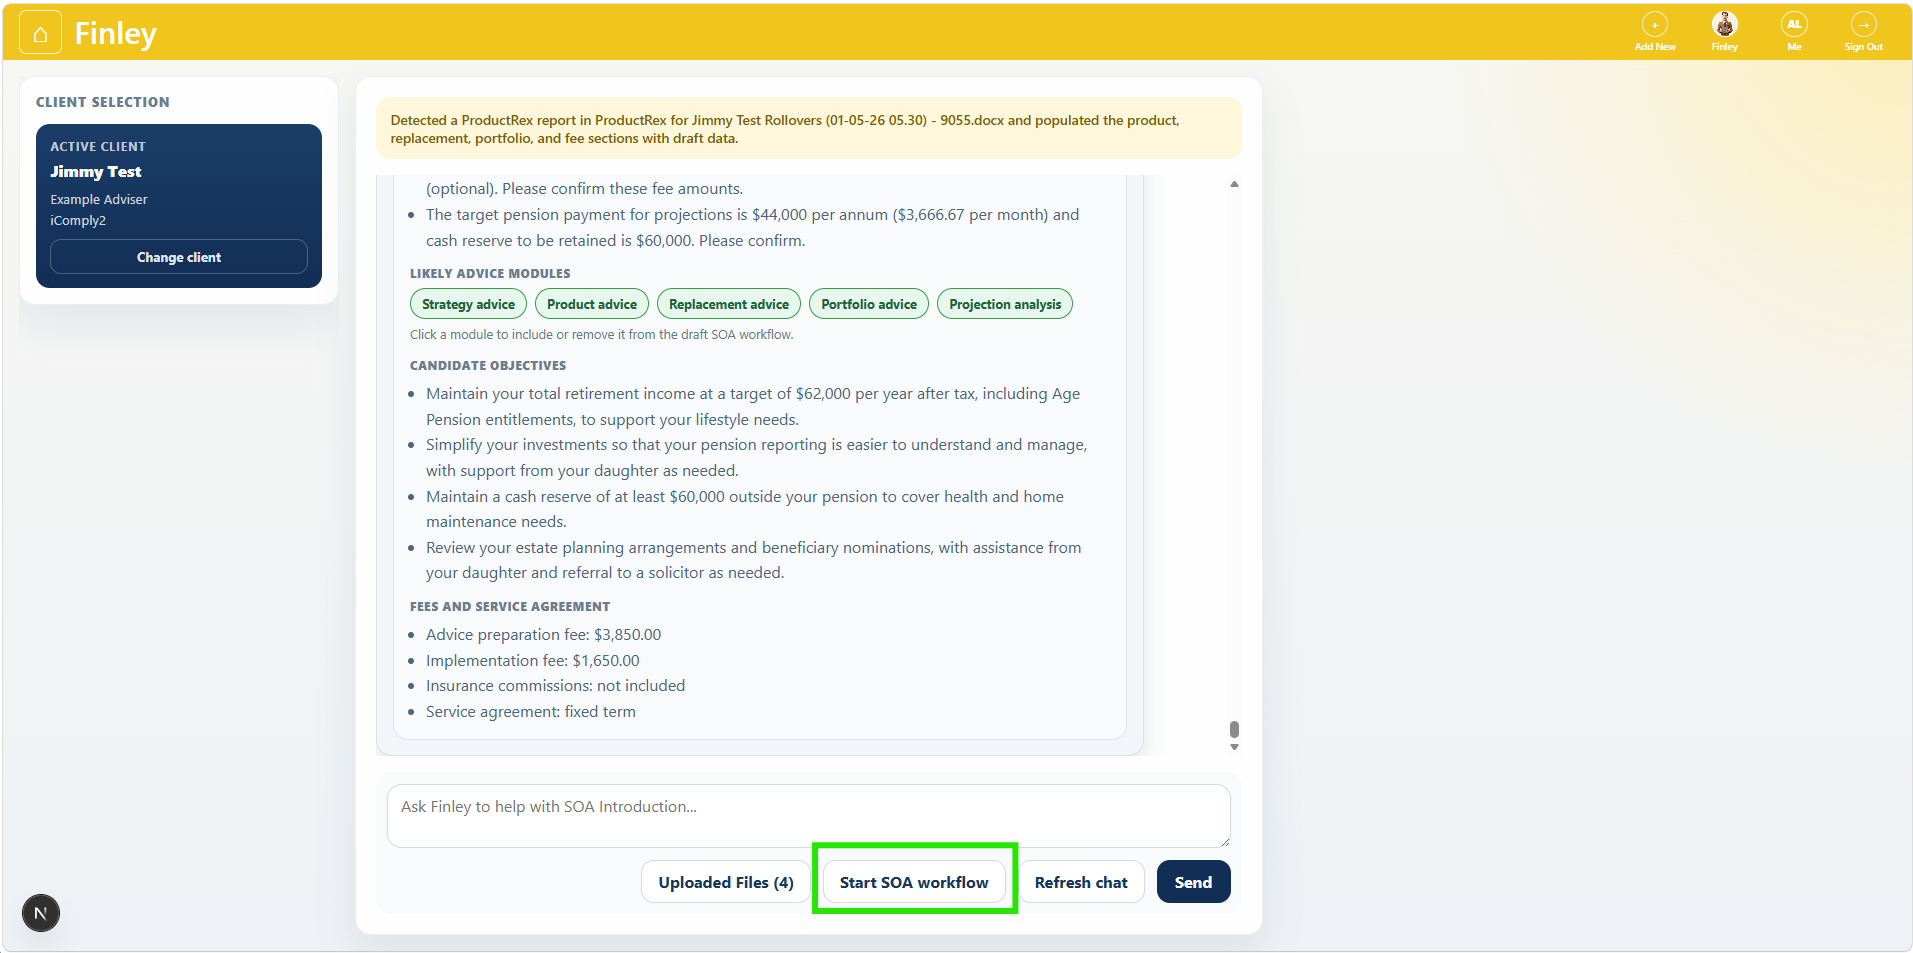
Once documents are uploaded and the brief is clear, click Start SOA workflow.
Finley will create the editable SOA workflow sections and open the live SOA render.
You can bypass the follow up questions at any time by clicking Start SOA Workflow.
Step 7: Working Through The SOA Section
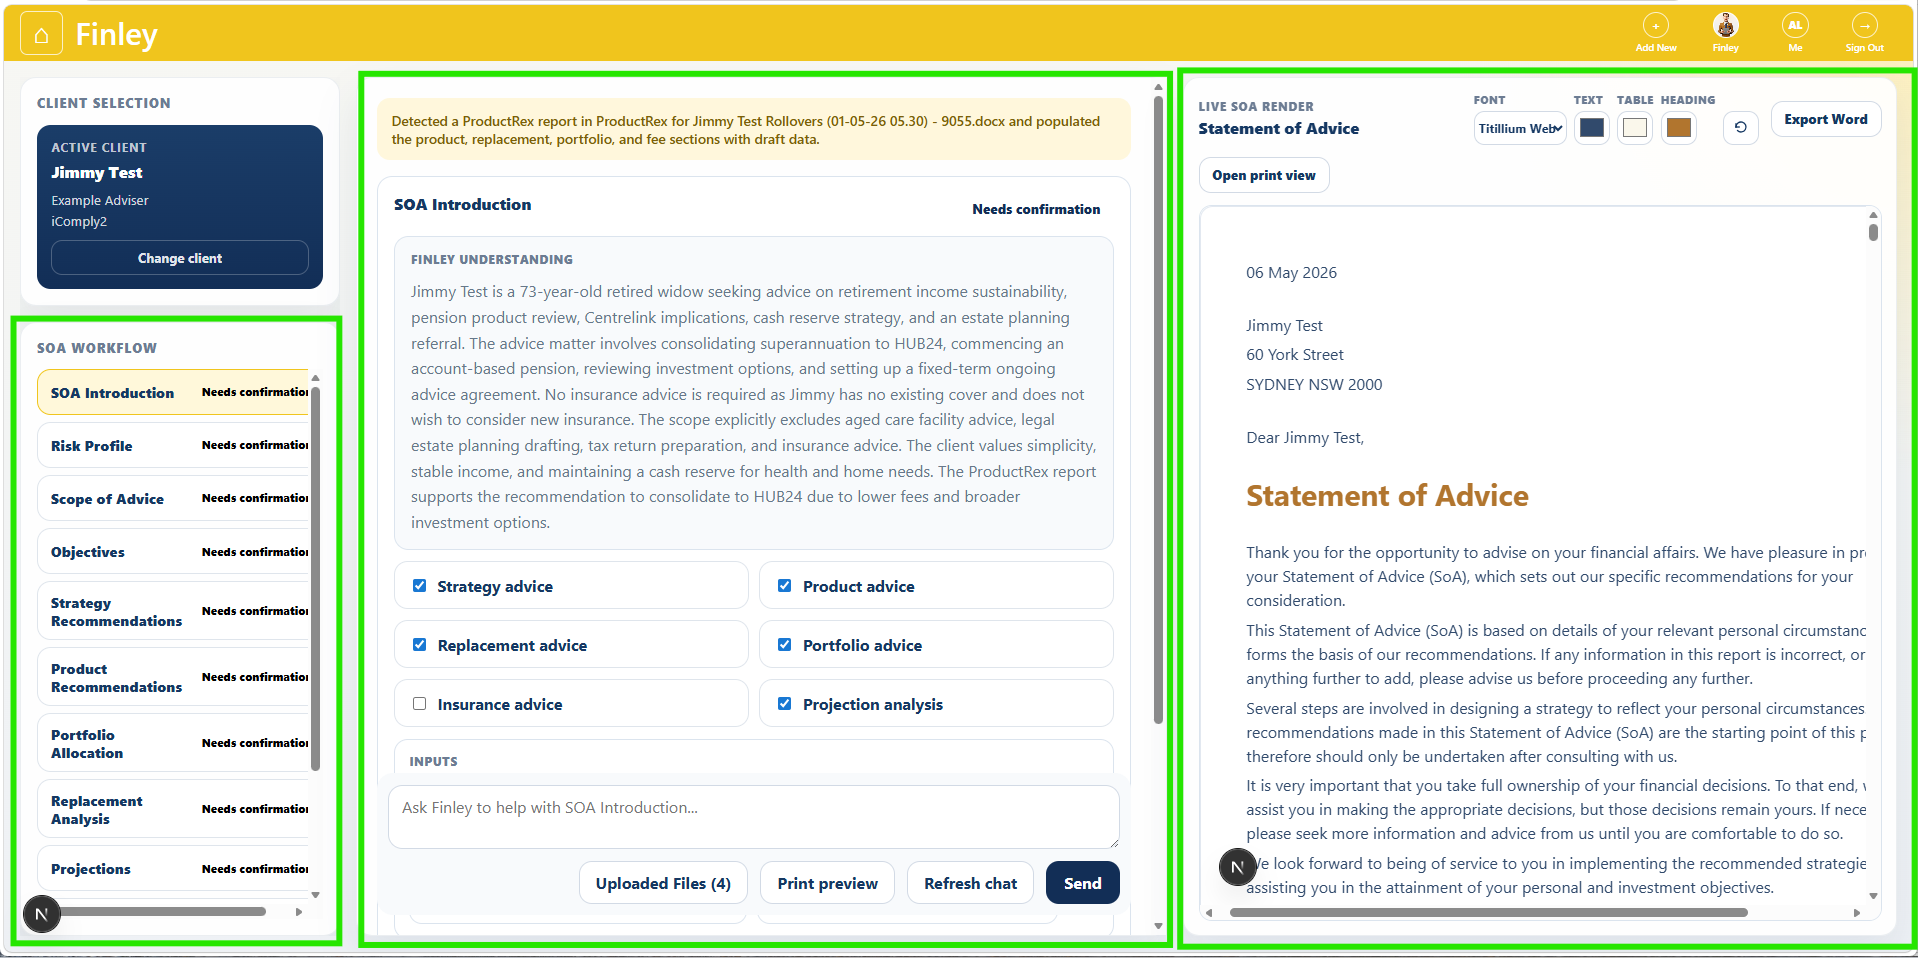
The SOA Workspace is divided into 3 sections. Work across the screen left to right as you progress through the SOA Workflow
The structured SOA Workflow.
The FInley Chat editor
The Live SOA document Render
Work Through Each SOA Section
Use the SOA workflow navigation on the left.
Review each section in order:
SOA Introduction
Risk Profile
Scope of Advice
Objectives
Strategy Recommendations
Product Recommendations
Portfolio Allocation
Replacement Analysis (if applicable)
Insurance Needs Analysis(if applicable)
Recommended Insurance Policies (if applicable)
Insurance Replacement (if applicable)
Projections (if applicable)
Disclosure
Service Agreement
Appendix
Edit Each Section
For each section, update the fields directly in the builder.
For recommendations, review:
Linked objectives
Recommendation wording
Reasons / client benefits
Consequences and trade-offs
Alternatives considered
Use Add objective, Add recommendation, or the relevant add buttons where required.
Use Chat To Refine Sections
Step 7: Using Chat To Refine Sections
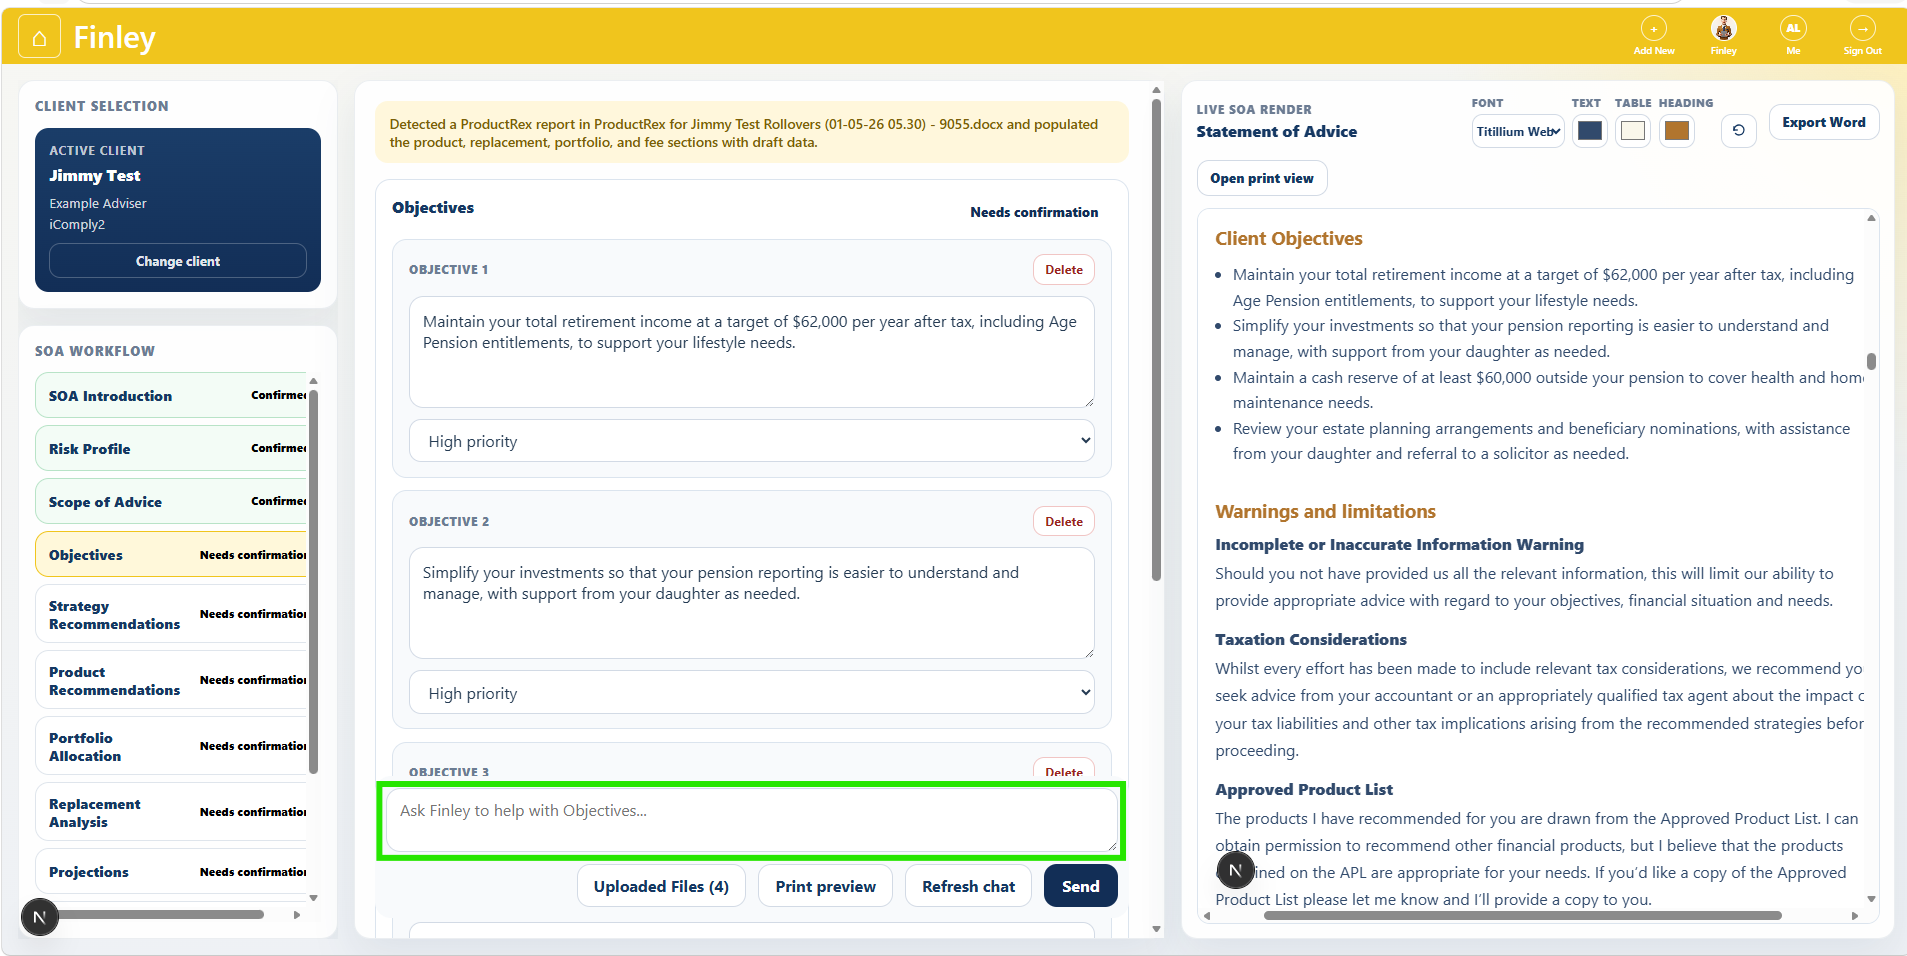
While working in a section, ask Finley to improve or rewrite content.
Example:
“Rewrite Objective 1 to be a more compliant SMART goal.”
or
“Add a recommendation for Jimmy to salary sacrifice $1,000 per month to super.”
Save Each Section
After reviewing a section, click Save.
This marks the section as confirmed and updates the live SOA render.
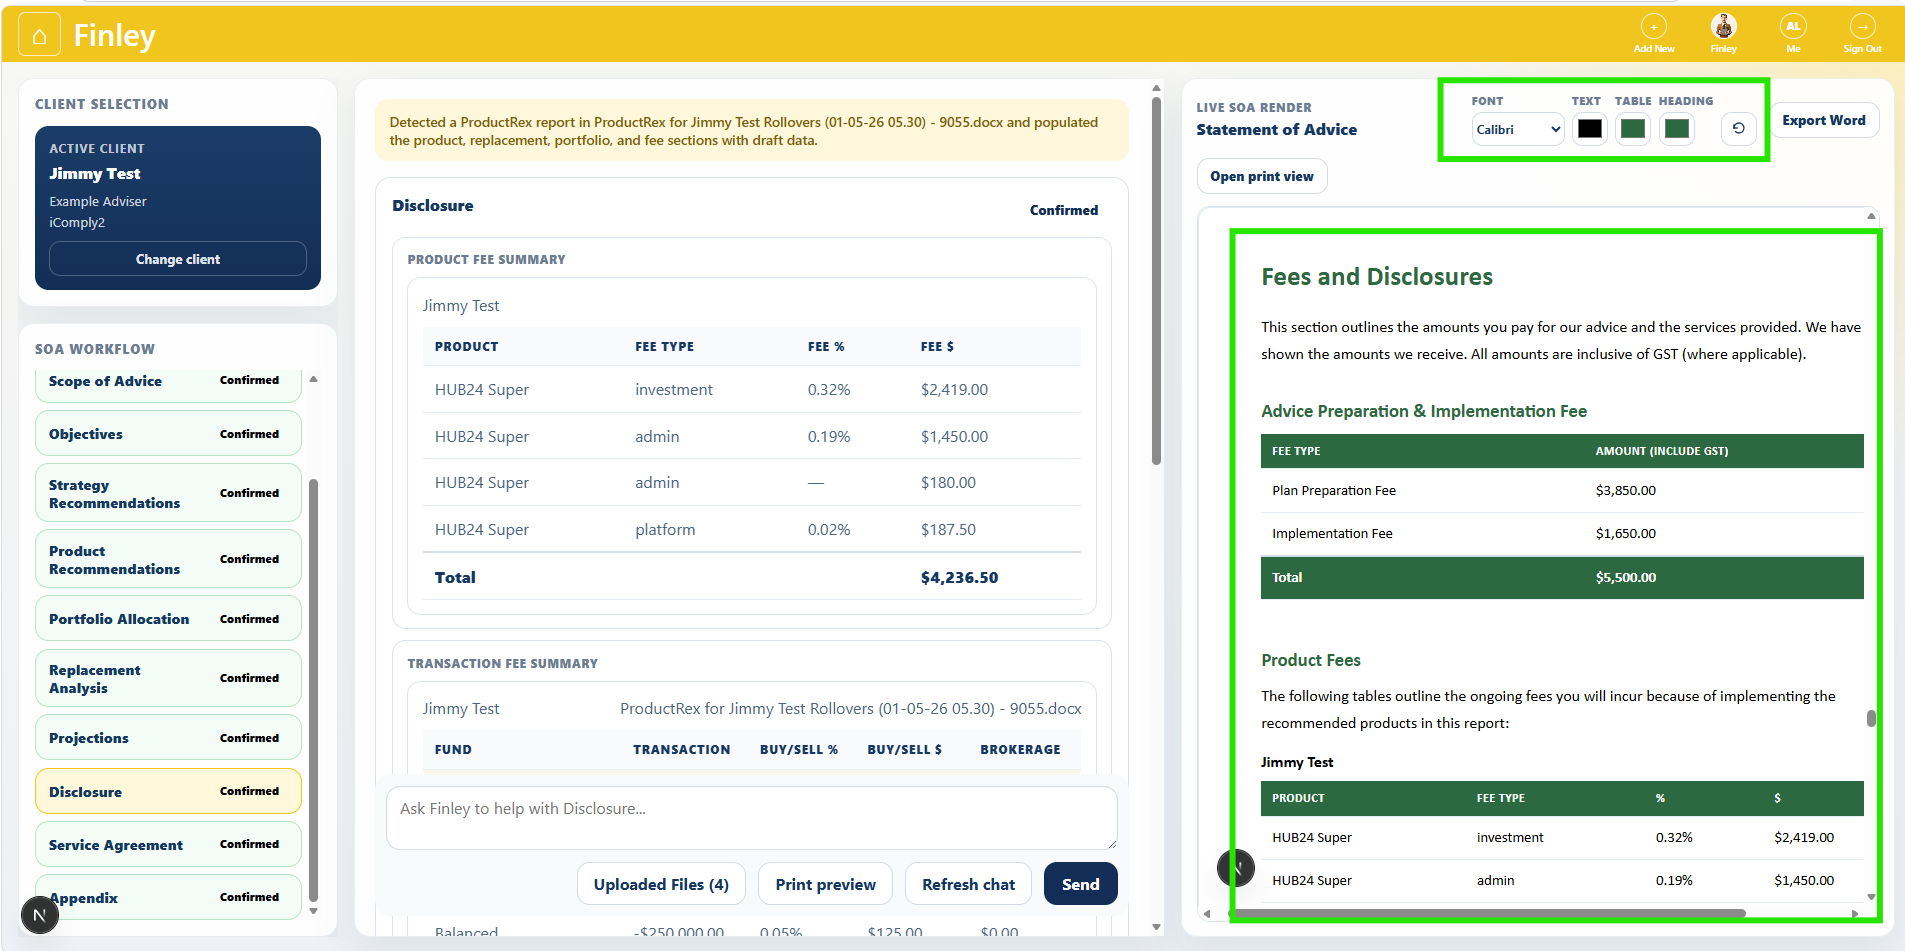
Check The Live SOA Render
Use the right-side Live SOA Render panel to review the document as it builds.
You can also click Open print view or Print preview for a larger review.
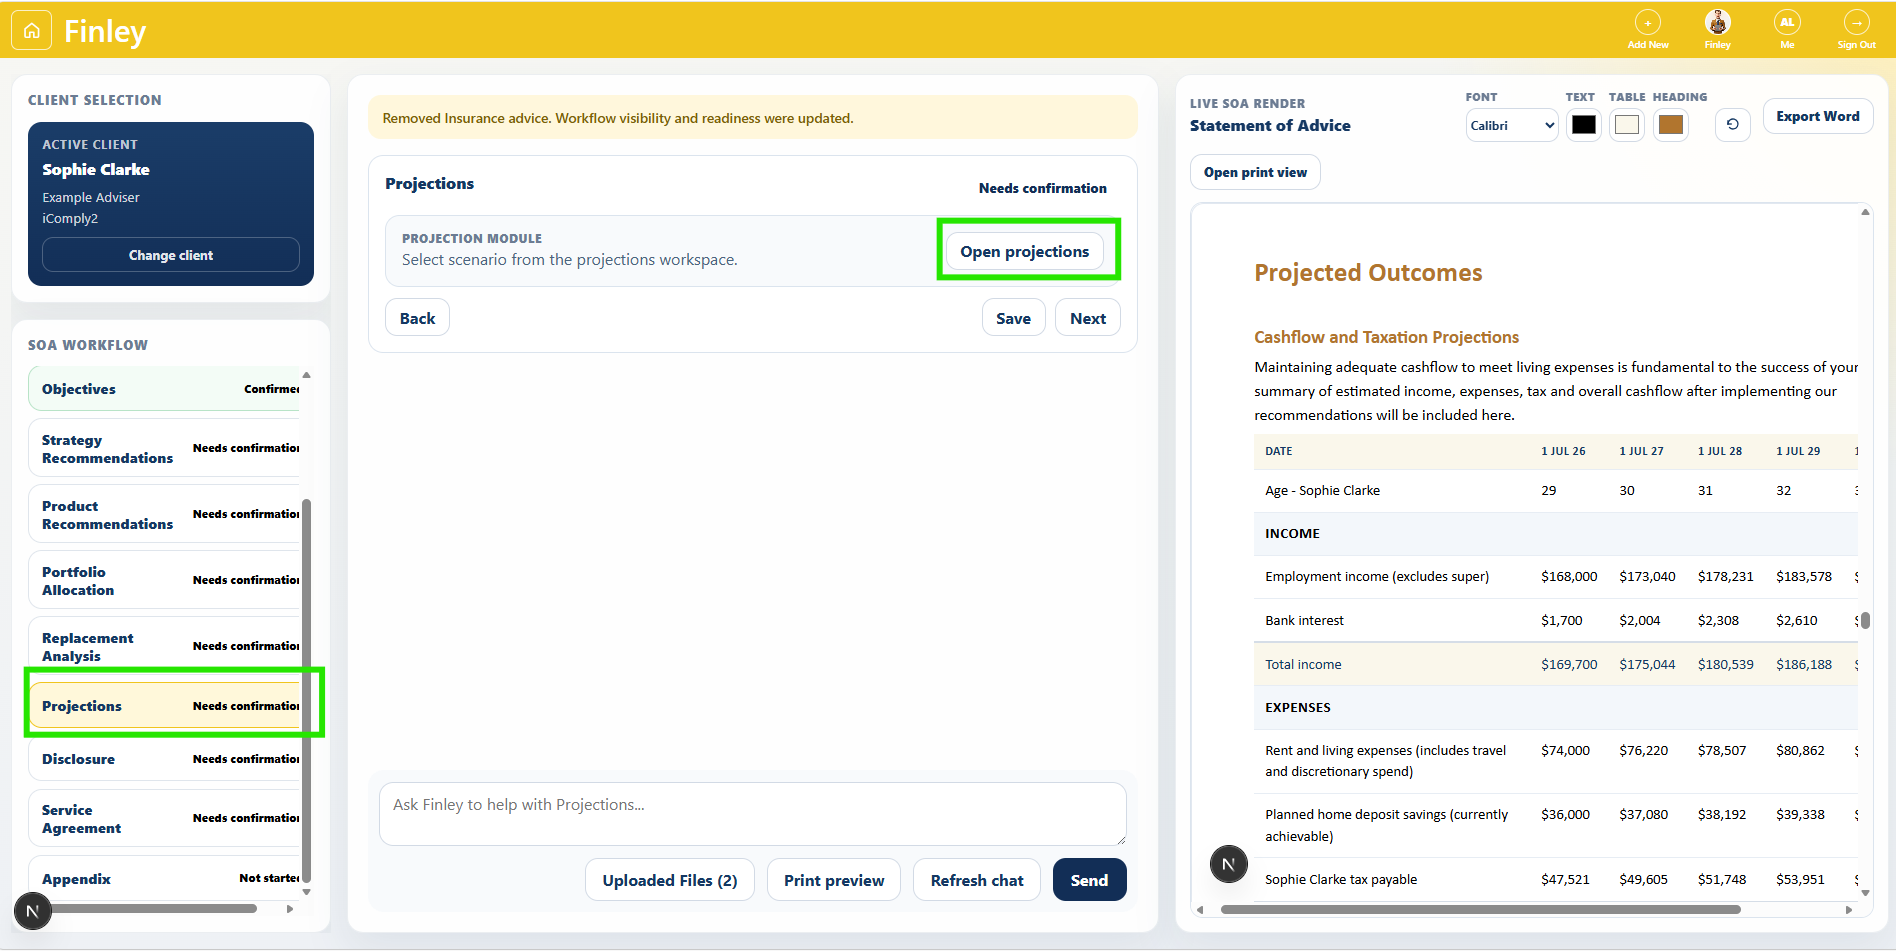
Step 8: Projections Workspace
Using the Projections Workspace in Filey, you can map out your clients’ financial projections and have the scenario rendered back into the SOA. From the Projections card in the Finley SOA Workspace, click on ‘Open Projections’. For further guidance on using the Projections Workspace, refer to: Using The Projections Workspace
Step 9: Export The SOA to .docx
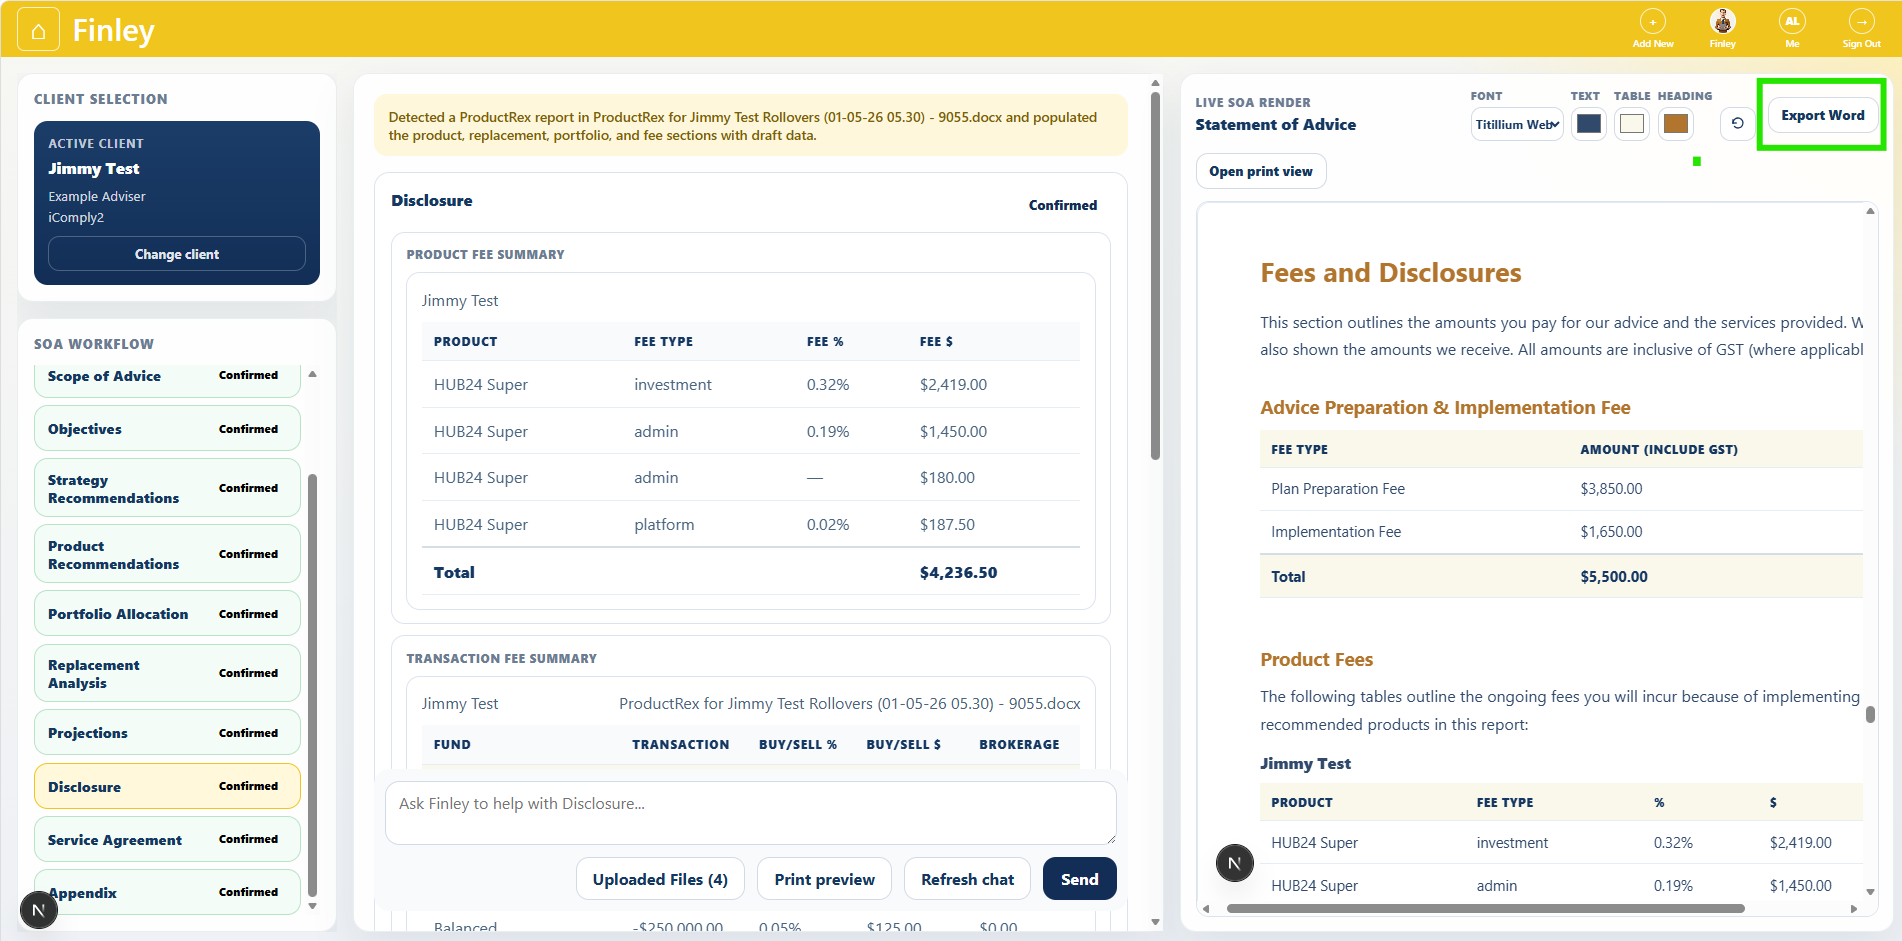
When the SOA is complete, click Export Word
Finley will generate the SOA to .docx
Final Adviser Review
Before sending to the client, review the Word document for compliance and accuracy.
Finley helps draft and structure the SOA, but the adviser should still complete the final compliance and advice review.
Document Styling Options
Using the document styling menu at the top of the Live SOA render, you can customise the font, text colour, tables colours and heading colours throughout the SOA.
When you export the SOA to .docx, the document will be exported in your chosen styles.