

Adviser Pre-vetting Guide
Follow this instructional guide on how to use the SARA app to pre-vet your SOA.
What is SARA?
SARA is an AI powered Statement of Advice Review Assistant. You can use SARA to pre-vet your SOA, before presenting to your client.
Uploading your SOA is simple. Once uploaded, the SARA App will provide the review findings for your assessment. But like any AI Assistant, the findings still needs to be reviewed for accuracy.
Following The Pre-Vetting Process
Step 1: Create New SOA Request
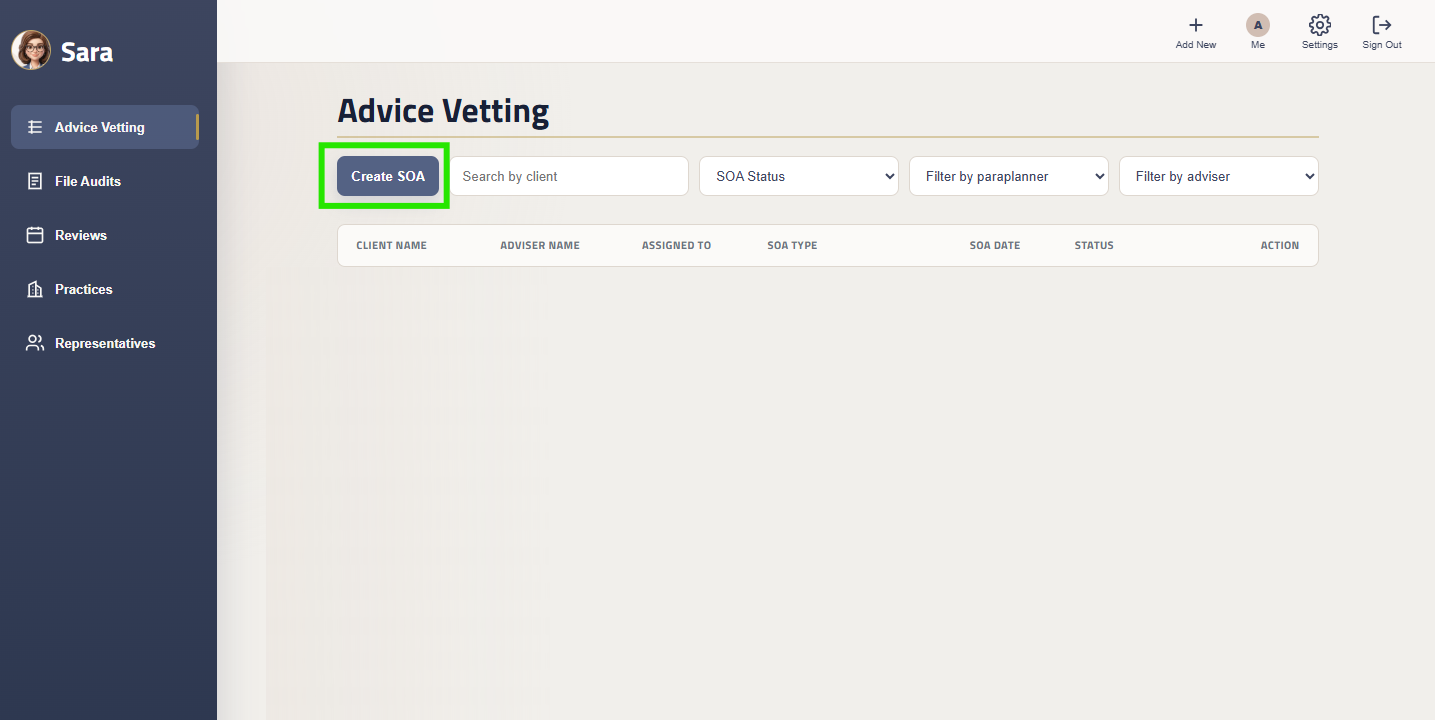
Action Required: From the Advice Vetting section, click the ‘Create SOA’ button.
Fill out the details of the SOA Request Popup.
Make sure you load up the SOA in the SOA Request
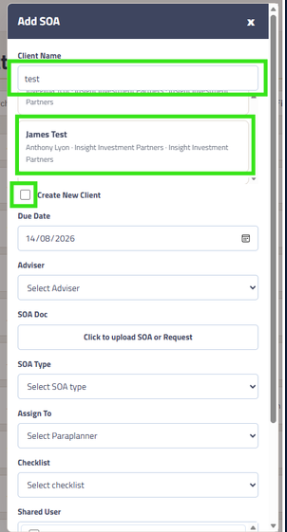
Fill Out The SOA Details
Complete the Add SOA Popup. You can search from your existing clients, or create a new client in Sara using the Create New Client checkbox.
Step 2. Send the SOA to SARA
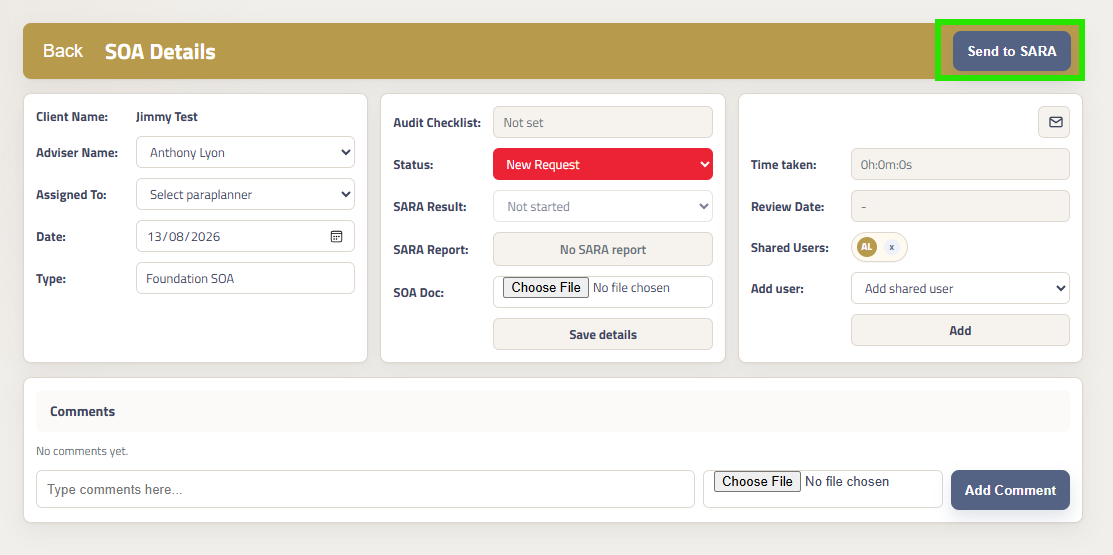
Click ‘Send to SARA’ button .to fill out the details of the SARA review, and upload your SOA.
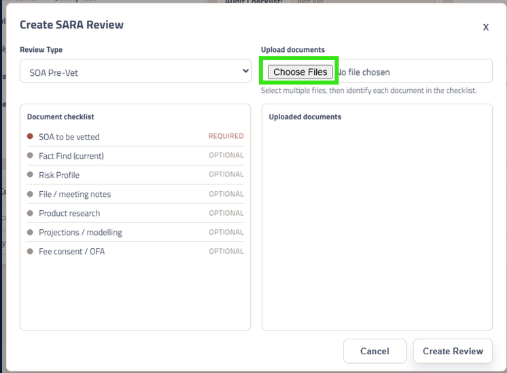
Uploading Files
Click the ‘Choose Files’ button to upload your documents to Sara
You can upload multiple files to send to Sara
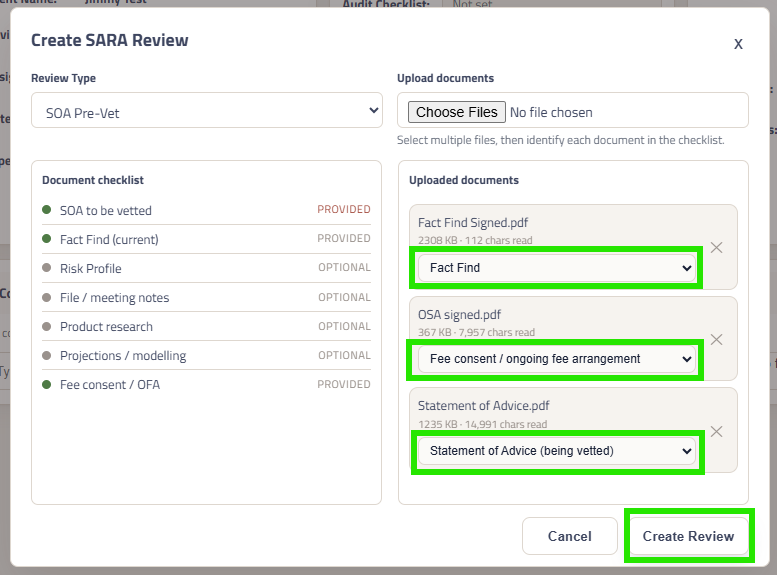
Mapping File Types
Once your files are uploaded, you can map each file to their relevant ‘file type’.
This will give Sara additional context what each file contains. When completing the compliance check, Sara will know which document to search for the required information. The more relevant documentation you provide to Sara, the better the outcome will be.
For best results, upload your documents in PDF format.
Once all files are mapped, click ‘Create Review’
Step 3: Assessing the Sara responses
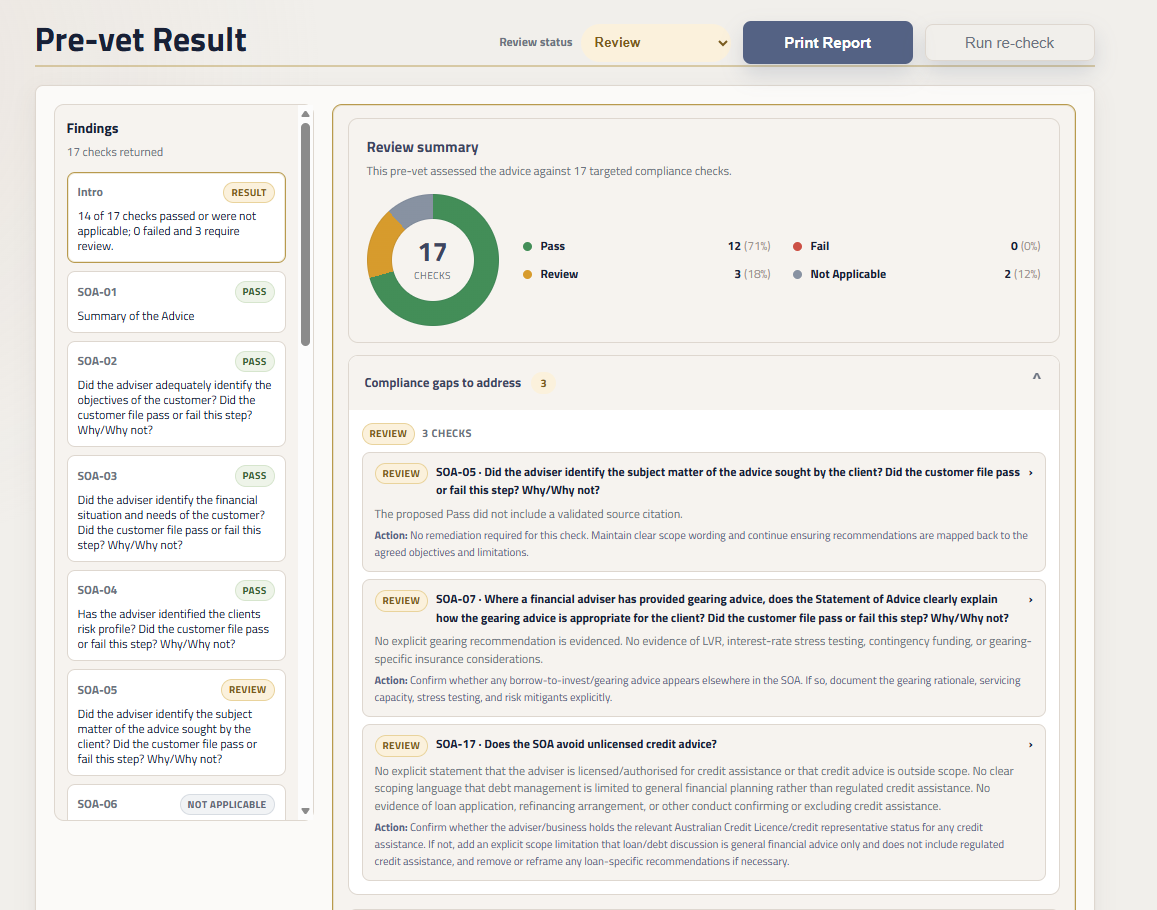
Once completed, the Pre-vet Result will be displayed.
Action Required: Read the compliance gaps to be addressed.
The compliance gaps will outline the actions to be taken on any identified sections that either fail or need to be reviewed.
Did the customer file pass or fail this step? Why/Why not?
What happens when i receive a ‘Pass’?
If SARA has identified that the file passes the relevant check, you can mark the check as ‘Pass’, and move to the next check.
What happens when i receive a ‘Fail’?
Action Required: If SARA has identified that the file fails the relevant check, you can take the following steps.
Update Your SOA: Update your SOA with the correct information. Then use the ‘Run Recheck’ feature to send the new information to SARA for re-checking.
Send to your Compliance Manager:
An ‘Adviser Comments’ input will appear.
You are able to make a comment on why the advice remains appropriate. This will be reviewed by the Compliance Manager
Update and Recheck:
Click the button below for a user guide on how ‘Update and Recheck’ works.
What happens when i receive a ‘Not applicable’?
Step 4: Print Compliance Report
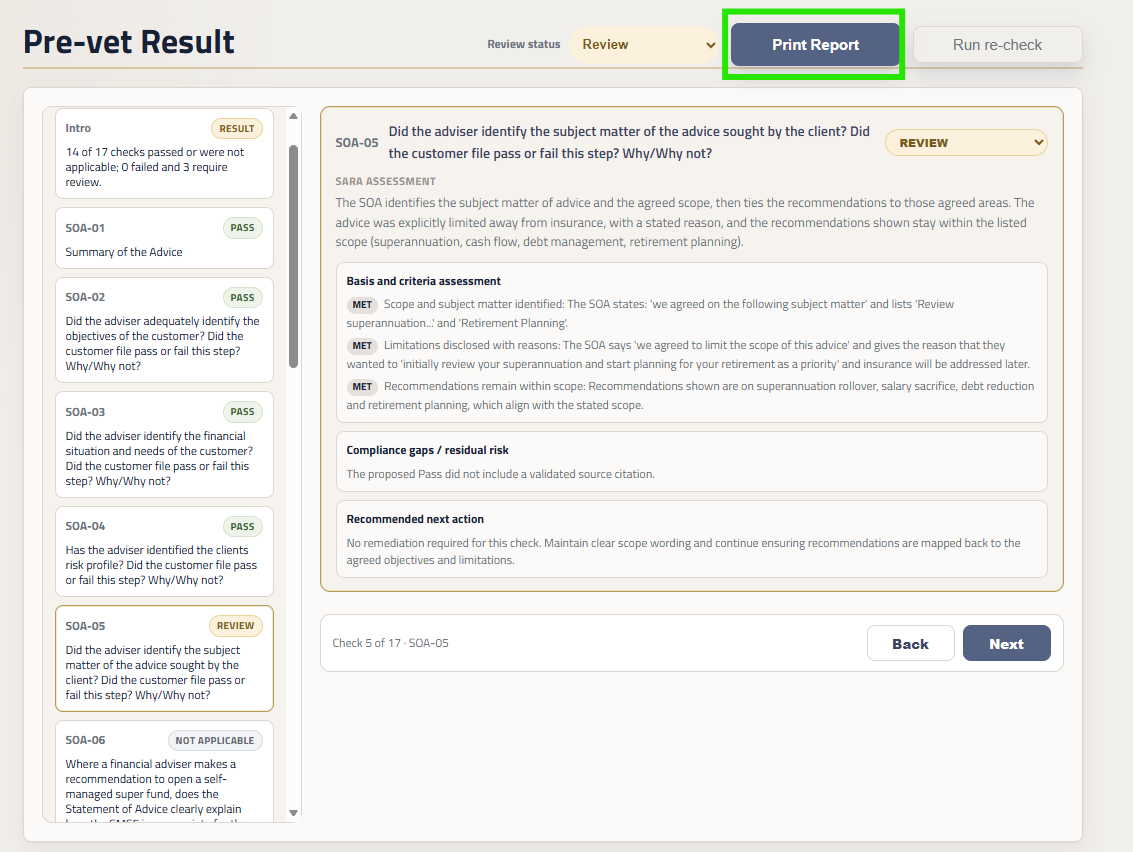
Action Required: At the completion of the wizard, click the ‘Print’ button to download the Compliance Report
Action Required: PDF the final downloaded Compliance Report
Approving The SOA:
If Sara has passed all the compliance checks in the review, you can approve the SOA.
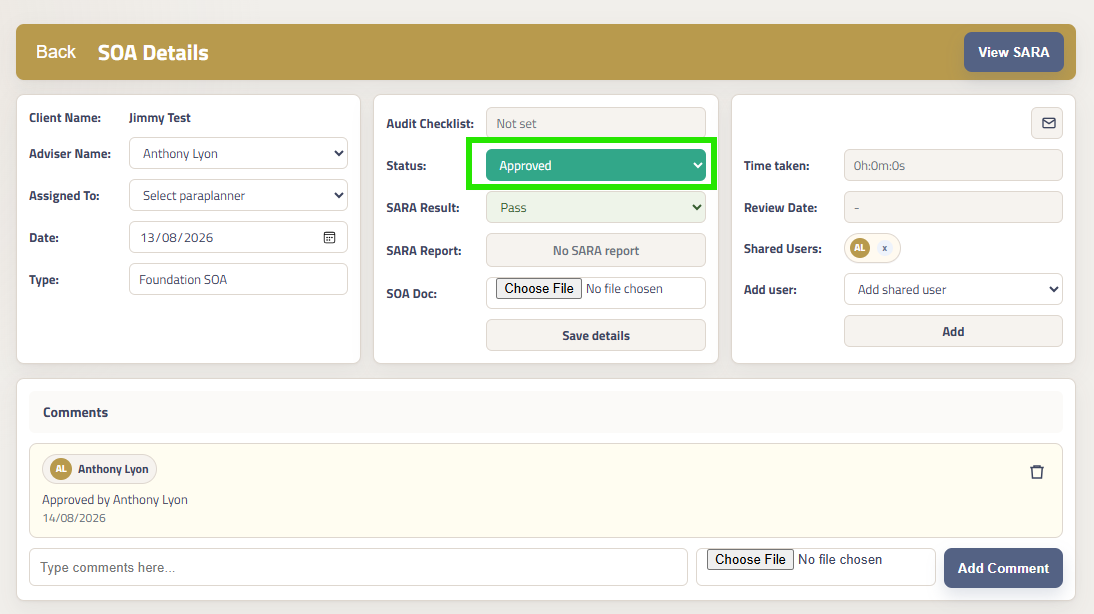
Actions Required: Upload the Compliance Report to the ‘SARA Report’ in the Projects App.
Actions Required: If the SOA passed all complaince checks, you can mark the SOA Status as ‘Approved’.
If your SOA did not pass all checks it will need a review from the Compliance Manager.
Sending Your SOA For Compliance Review:
If any of the compliance checks have failed, your SOA will need to be reviewed by the Compliance Manager.
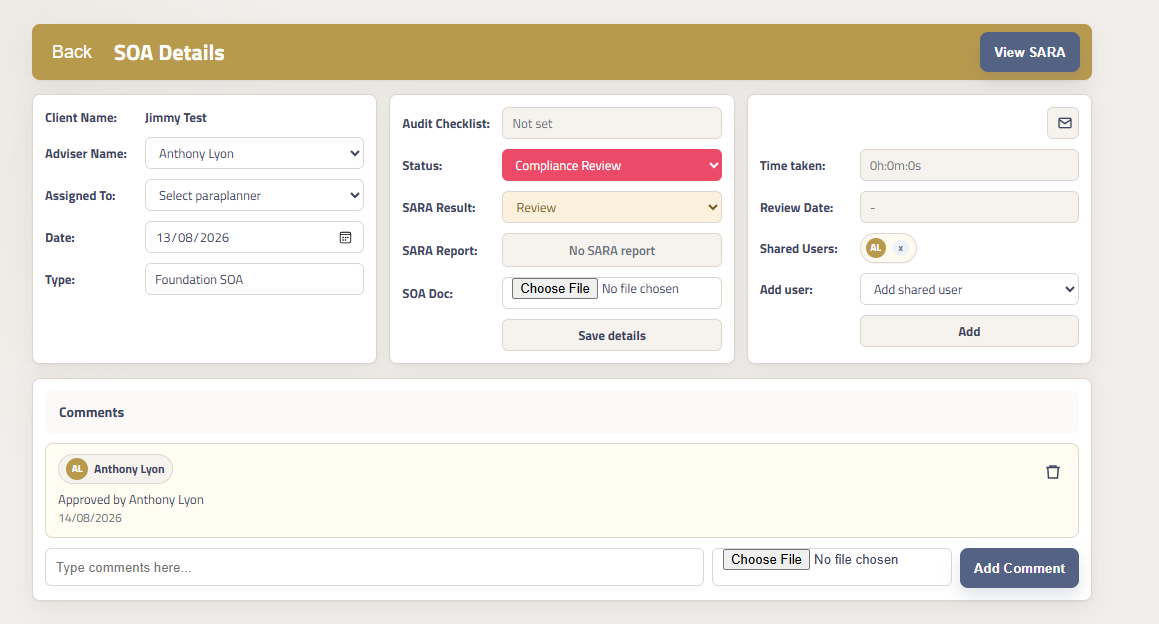
Actions Required: Update the Status of the SOA to ‘Compliance Review’. This will notify your Compliance Manger that it needs checking.
Ensure a copy of your SOA is uploaded in the SOA Doc section.
Your Compliance Manager will review:
The SOA
Supporting documentation
The Sara Report
Do you need any further assistance?
If you need any assistance or something just doesn’t look right, you can raise a support request